
Connect ChatGPT to Claras
This guide explains how to connect ChatGPT to Claras with a custom connector so ChatGPT can work with your practice data.
Connected agents must be on for your practice first. Custom connectors also require a paid ChatGPT plan and may need developer mode or admin approval in your workspace. Confirm current eligibility in OpenAI’s connector documentation.
ChatGPT reads your client information as it is stored, including full meeting transcripts and client records. Claras redaction does not apply to it, and Claras data commitments do not follow that information into your ChatGPT account. See Client information and privacy before you connect.
Overview
ChatGPT connects to Claras with a custom connector and a secure sign-in. You do not paste a Claras personal access token into ChatGPT for this flow. After you approve access with multi-factor authentication, ChatGPT can call Claras tools under your profile.
Before you start
Connected agents enabled for your practice.
A Claras account with multi-factor authentication set up.
A ChatGPT plan that supports custom connectors. Workspace admins may need to allow custom connectors.
Developer mode enabled if your ChatGPT settings require it for custom connectors (path names change; look under Settings for apps, connectors, or advanced settings).
Add Claras in ChatGPT
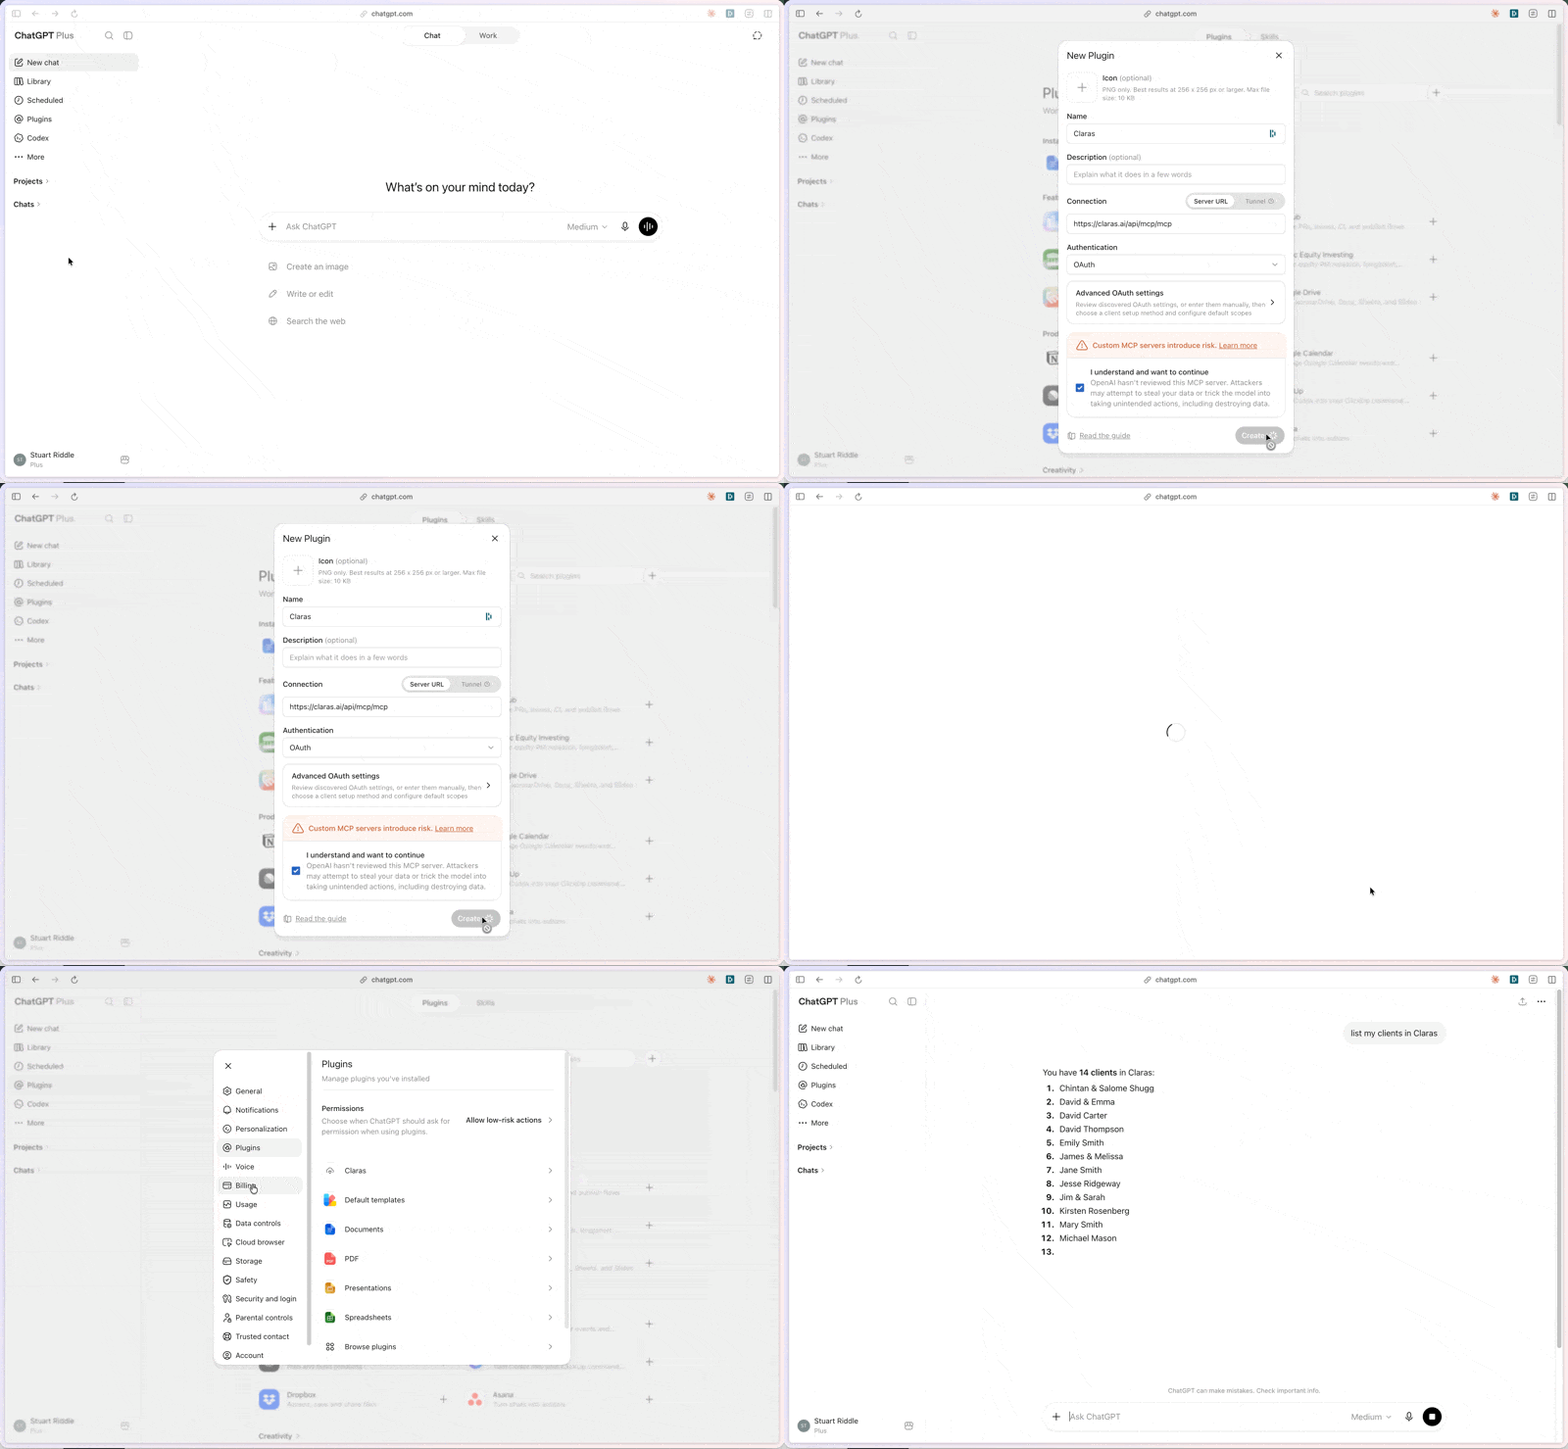
Open ChatGPT on the web and open Settings.
Open the plugins page, and enable developer mode if your plan uses that gate.
Create a custom connector from the plugins page. Set the name to Claras and the server URL to
https://claras.ai/api/mcp/mcp. Choose OAuth or sign-in authentication when offered (not a static API key).Save, then connect and complete the Claras sign-in and multi-factor challenge.
On the Claras consent screen, confirm the practice and approve access.
Use Claras in a chat
Start a chat and enable the Claras connector for that conversation if ChatGPT asks.
Describe the Claras work you want. For example: find client Jordan Lee, create a meeting with the Review template for today, paste this transcript, submit processing, then tell me when the file note is ready.
Approve tool actions carefully when ChatGPT asks, especially deletes and finalise steps.
If something goes wrong
No option to add a custom connector: your plan or workspace policy may block it. Check OpenAI’s plan documentation and ask a workspace admin.
Connected agents not enabled: a Claras practice owner must turn the setting on.
Sign-in loops or consent errors: complete MFA in Claras, then reconnect. Clear a stale connector and add Claras again if needed.
Tools missing or read-only behaviour: some ChatGPT plans have limited write behaviour for custom connectors. Check OpenAI’s current limits, or use Claude / a personal access token host if you need the full tool set.
Related
Last updated 30th July 2026 by Tsogt