Create a provider in Entra
This guide walks through setting up Microsoft Entra as your SSO provider for Claras, enabling your team to sign in with their Microsoft accounts.
Overview
Connecting Microsoft Entra to Claras requires creating an enterprise application in your Entra admin dashboard and configuring SAML authentication. The process takes about 15 minutes and requires administrator access to both Entra and Claras. Once configured, your team can access Claras through the Office 365 app launcher or standard SSO login.
Before creating a provider, ensure you've added and verified your domain. Your domain must show "Verified" status for SSO to function correctly.
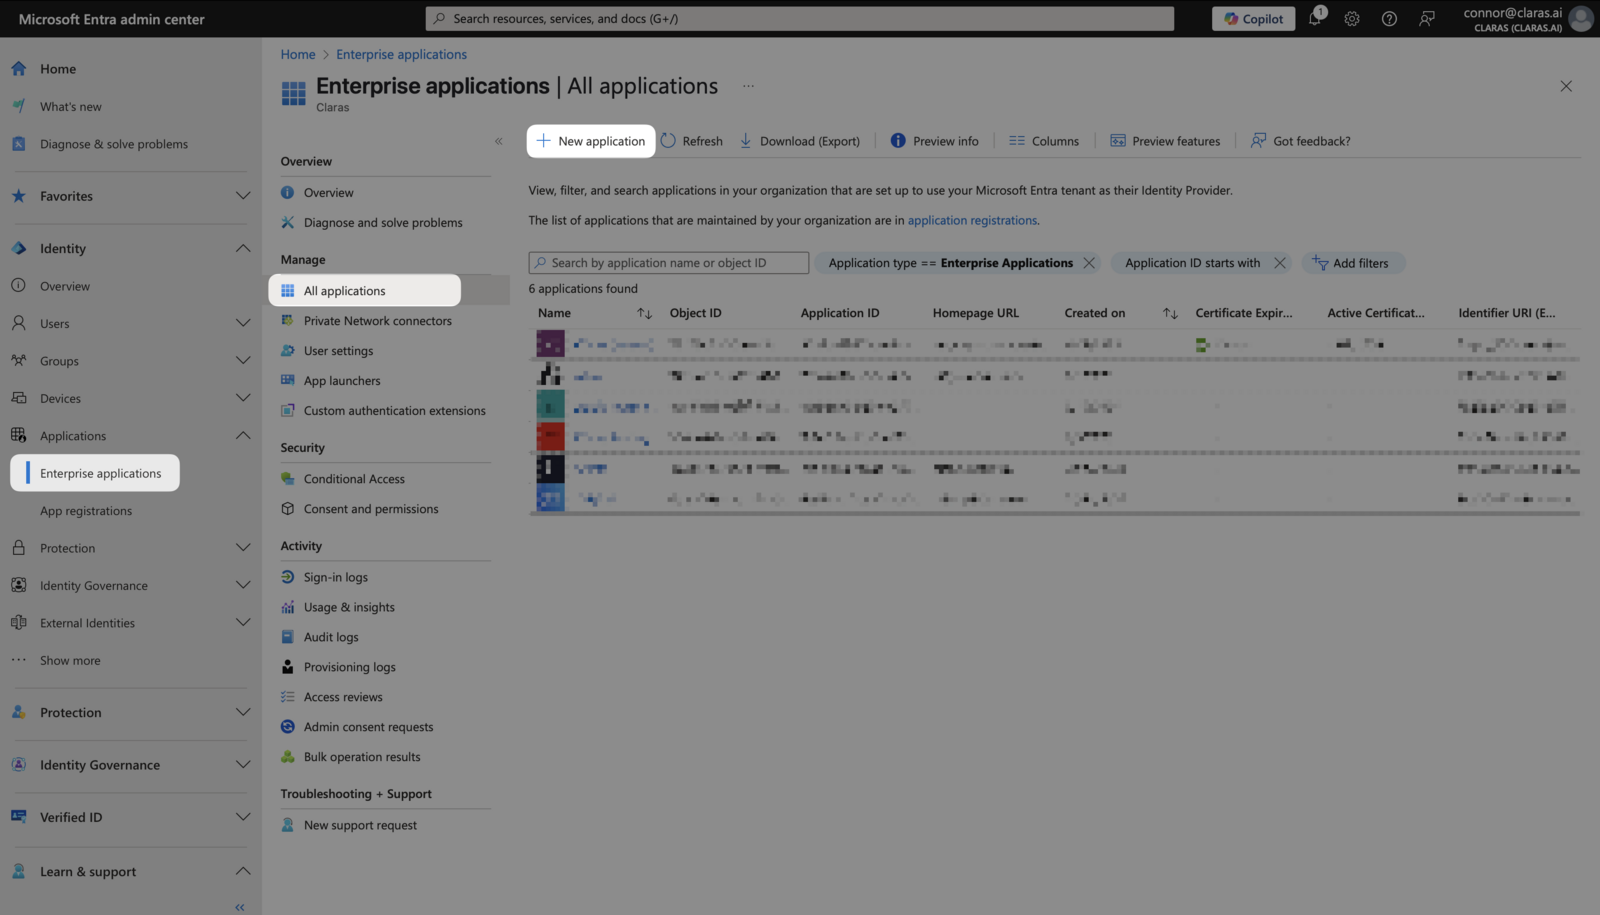
Create the enterprise application
Register an application
Open the Microsoft Entra admin dashboard and navigate to Identity → Applications → Enterprise applications. Click + New application to begin setup.
Choose to create your own application
Select + Create your own application to use the custom enterprise application setup for Claras.
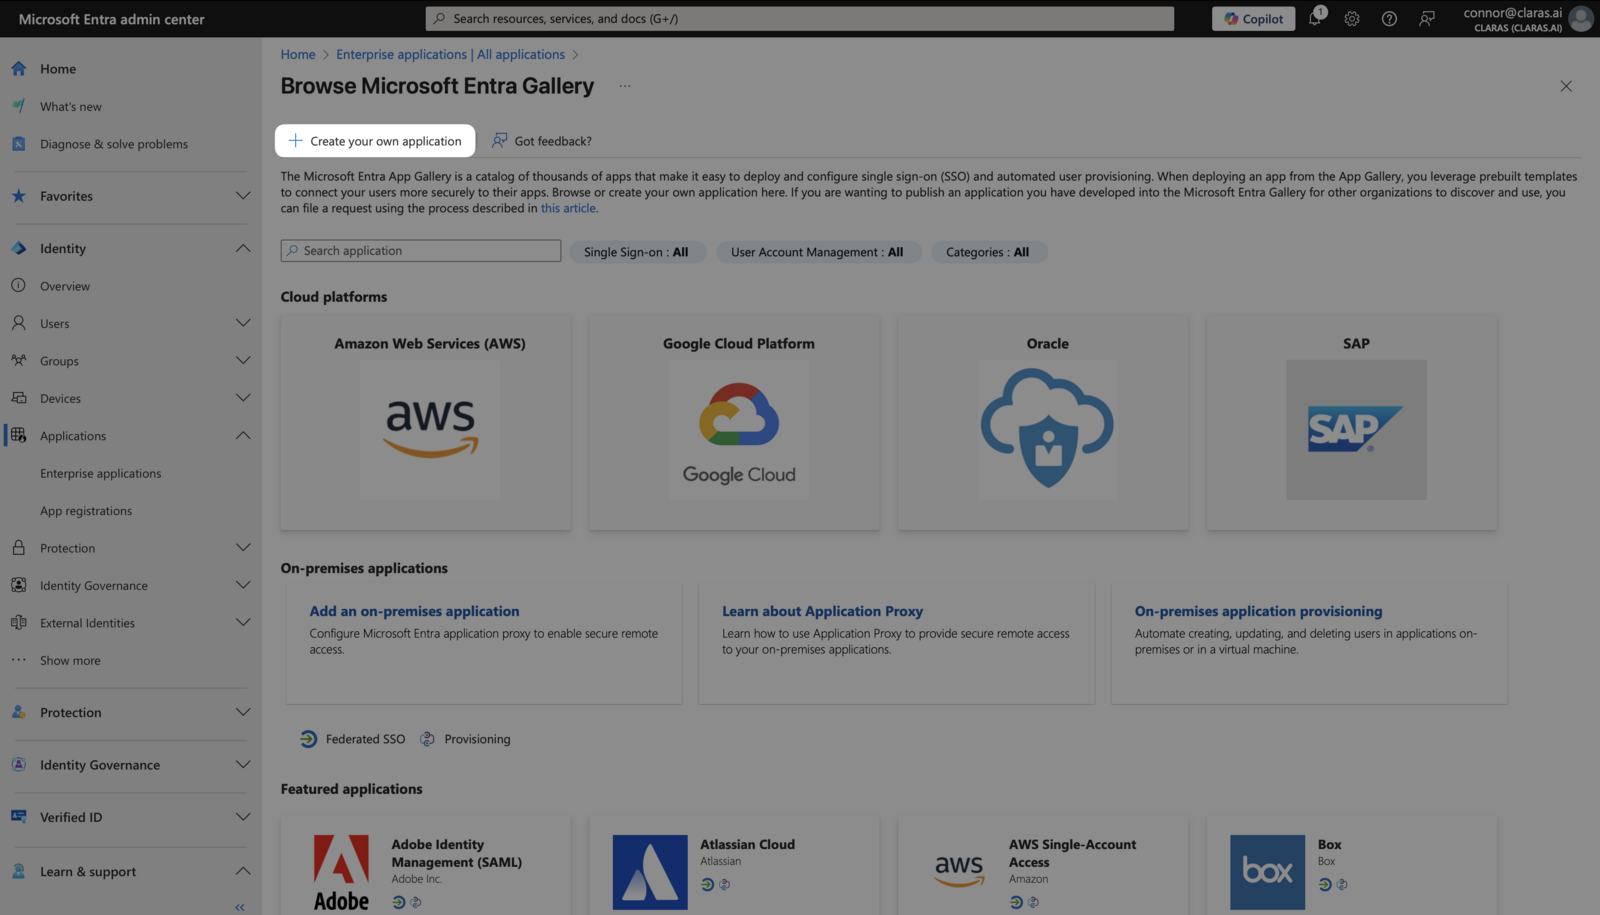
Fill in application details
In the "Create your own application" modal, enter "Claras" as the display name. This name appears when your team signs in through Entra.
Select the third option: Integrate any other application you don't find in the gallery (Non-gallery), then click Create.
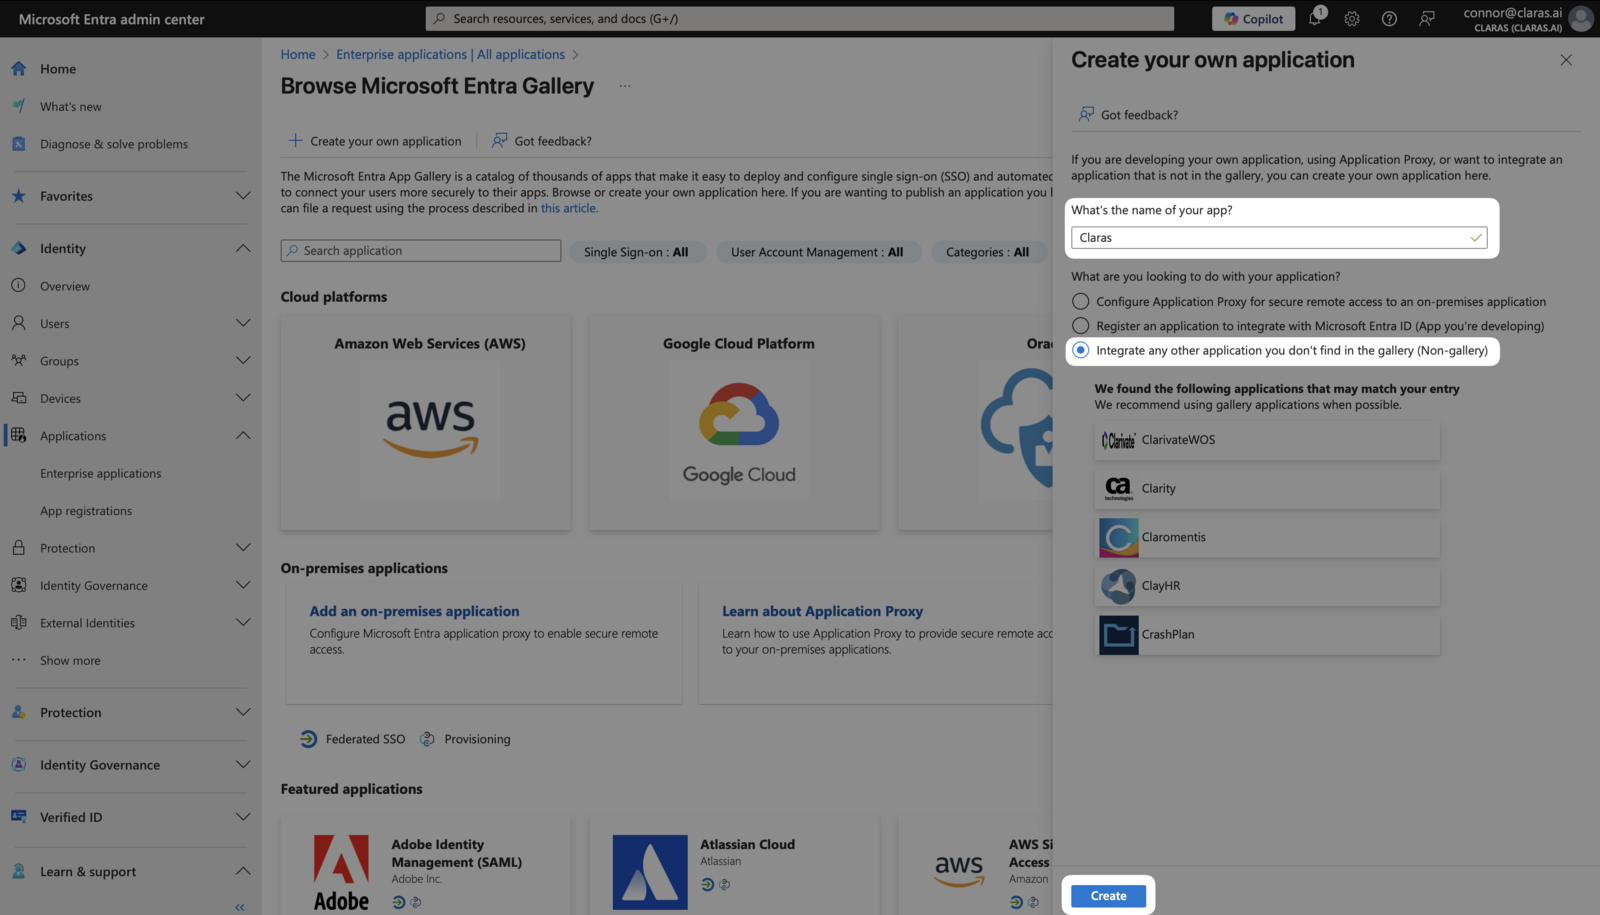
Set up single sign-on
In the sidebar, navigate to Manage → Single sign-on and select SAML.
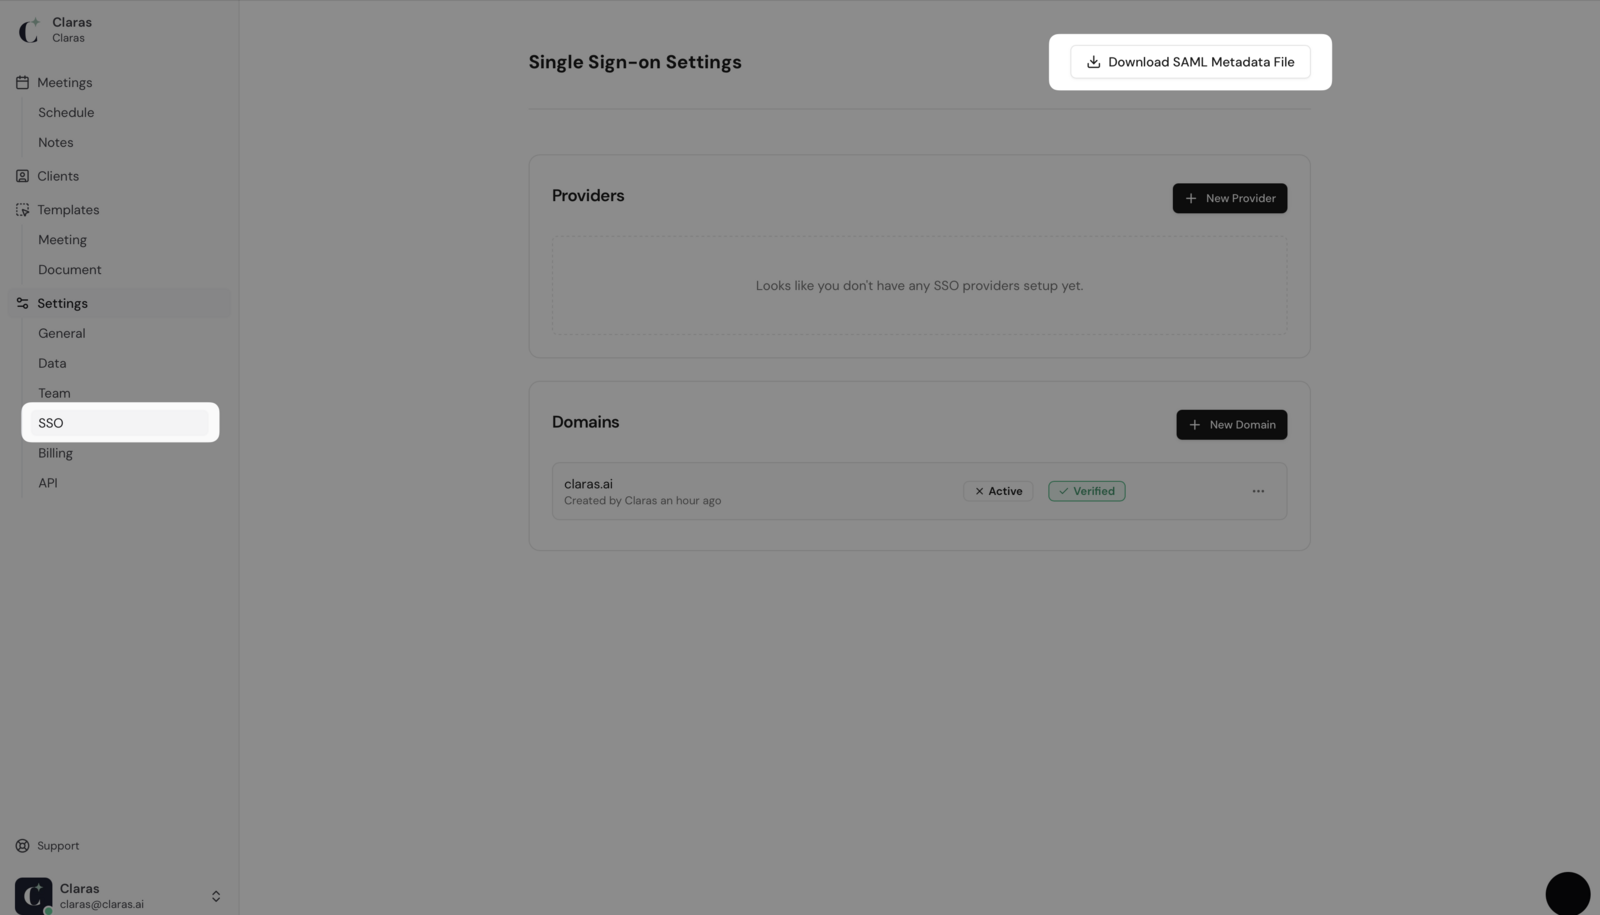
Open Claras in a separate tab and navigate to Settings → SSO. Click Download SAML Metadata File to get your configuration file.
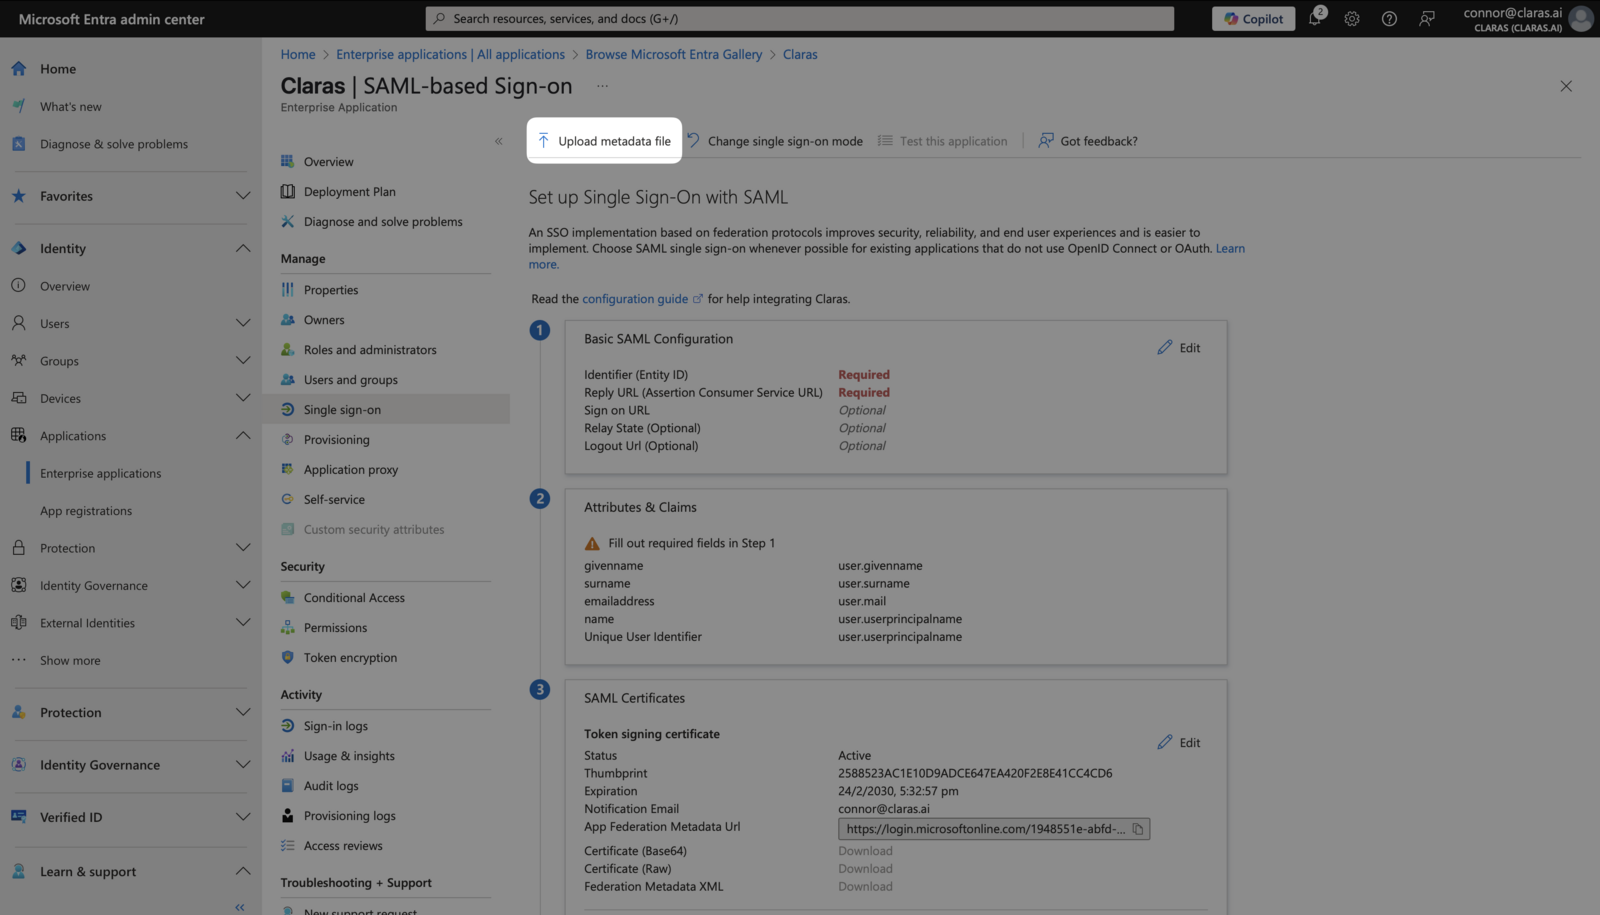
Return to Entra and upload this metadata file. The configuration fields will populate automatically.
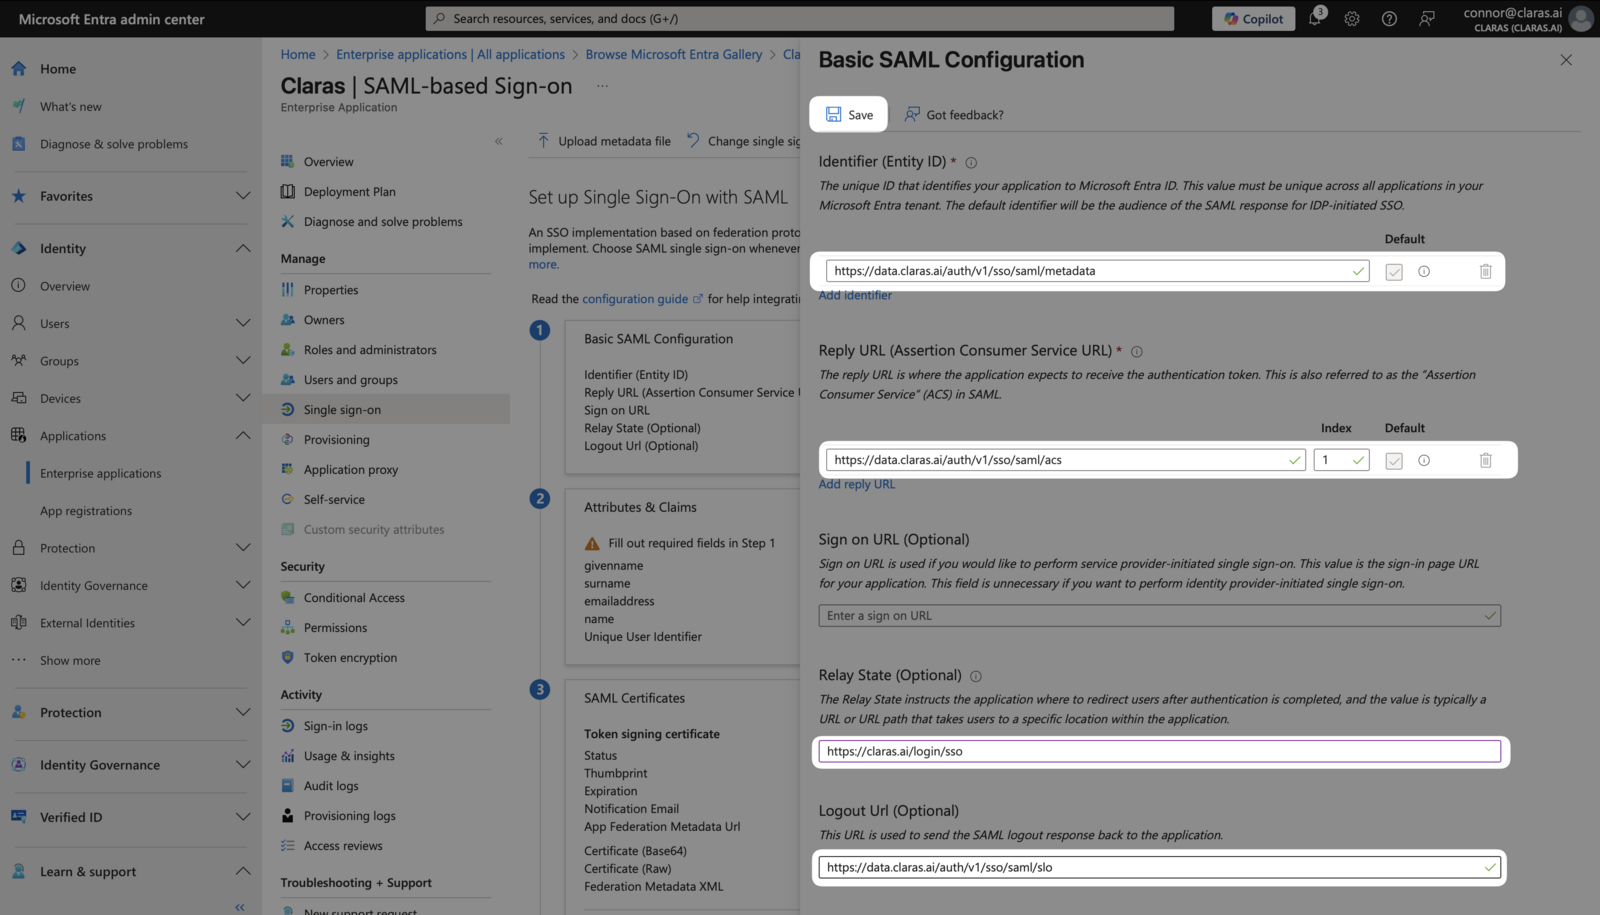
Add one additional field to enable single-click login from the Office 365 launcher. In the "Relay State" field, enter:
https://claras.ai/login/sso
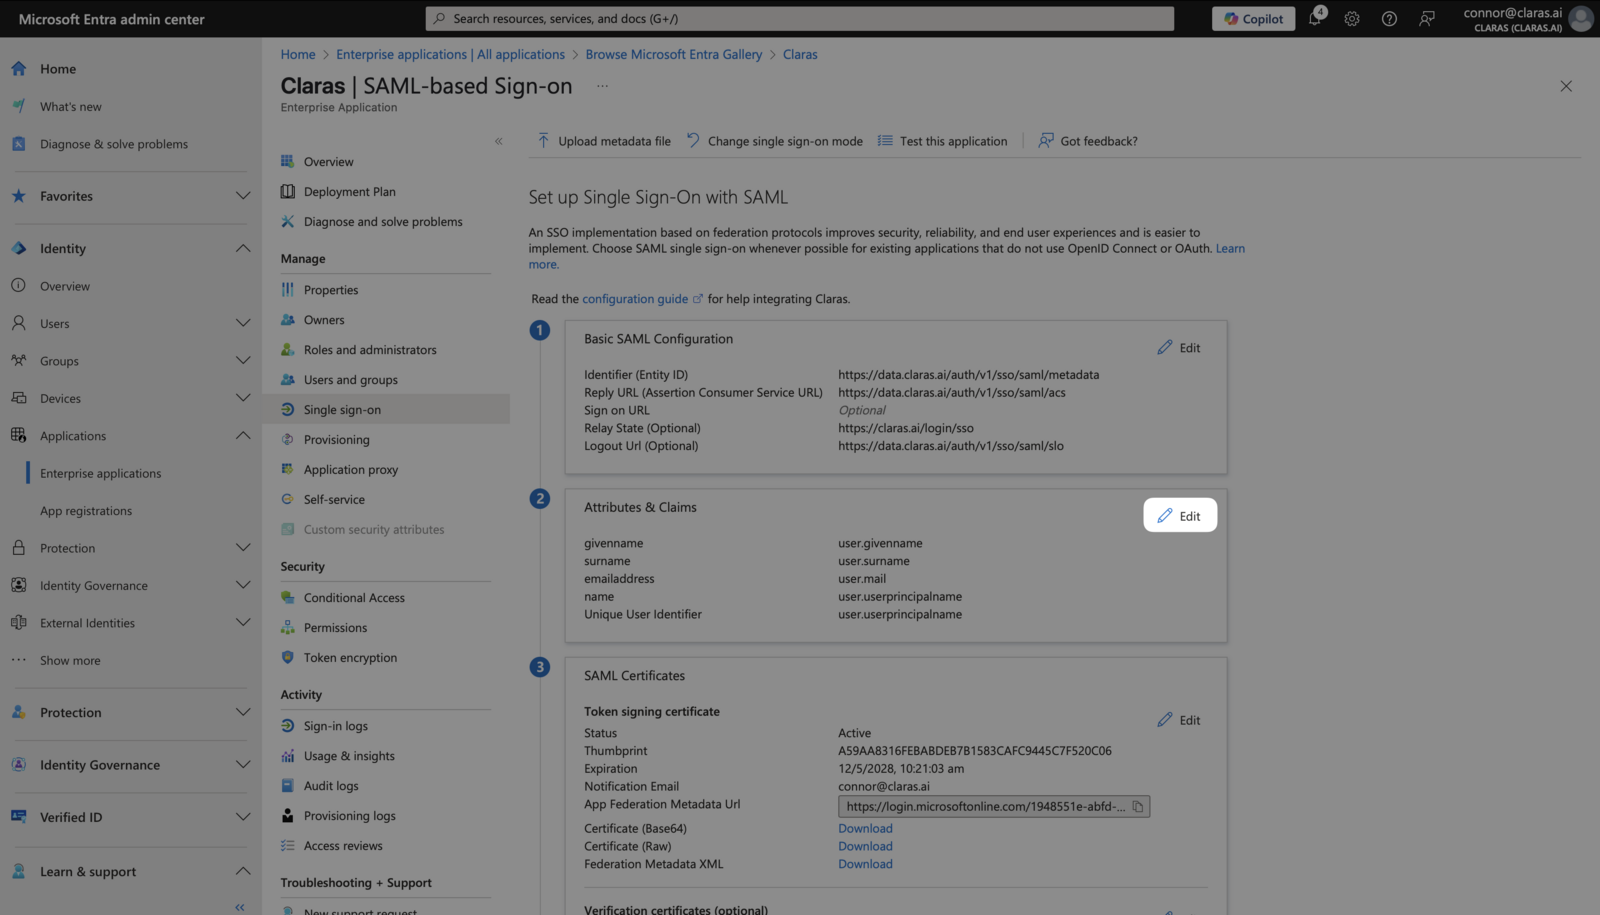
Leave the "Sign on URL" field blank. Your Basic SAML Configuration should match the screenshot below. Save your changes.
If prompted to test Single Sign-on, select No, I'll test later.
Create the provider in Claras
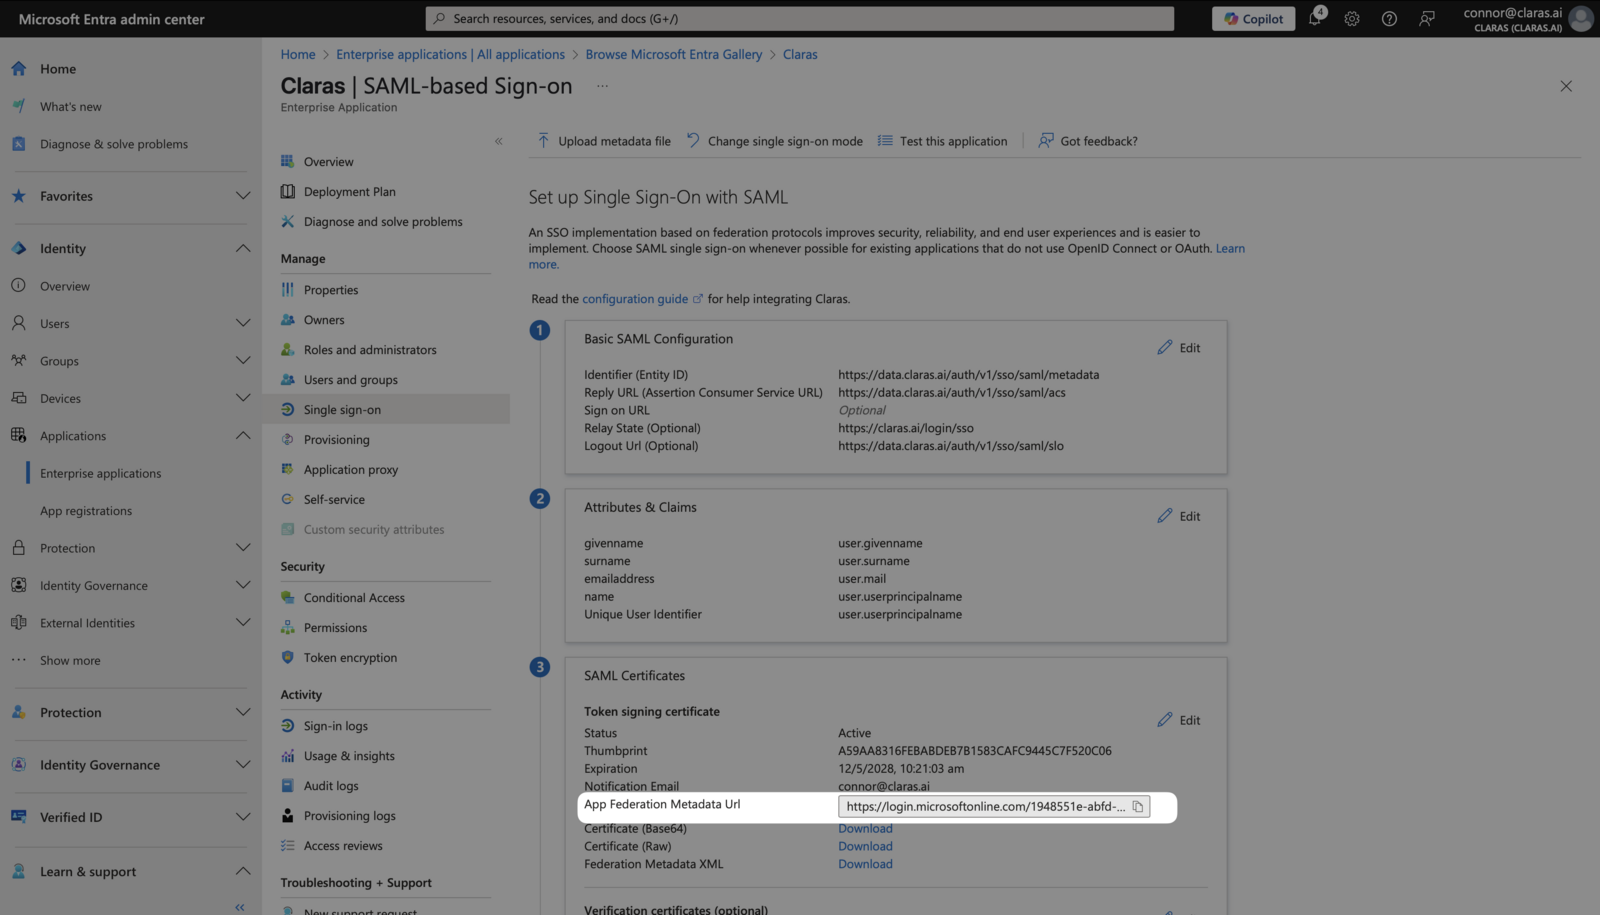
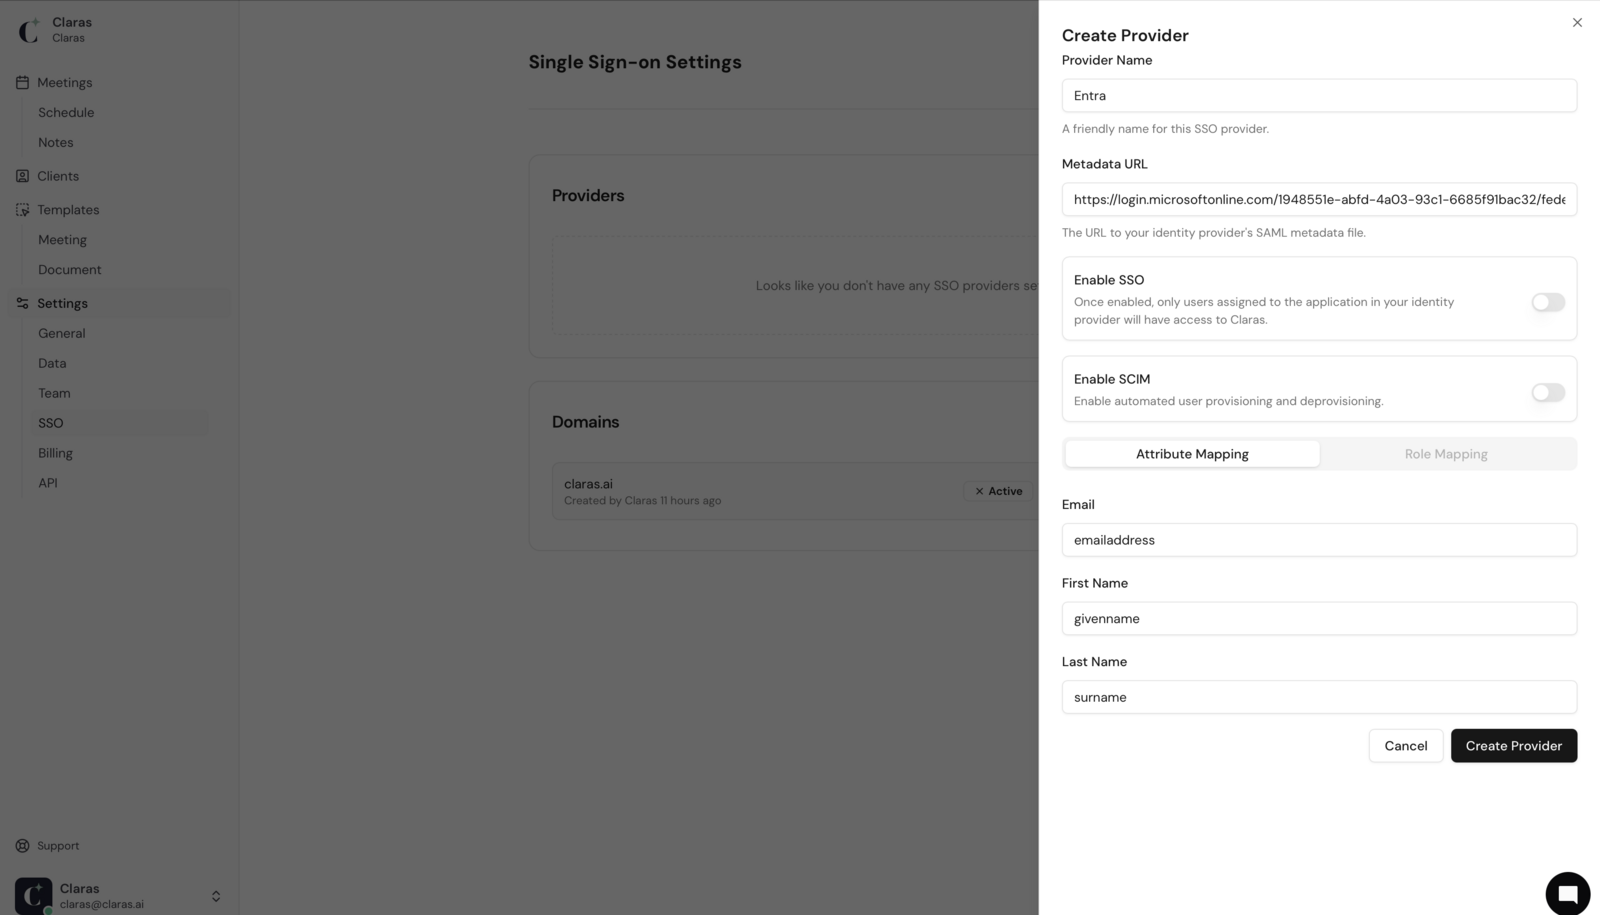
Copy the "App Federation Metadata URL" from step 3 of the Single sign-on page in Entra.
Return to Claras and click New Provider on the SSO page. Enter "Entra" as the name and paste the Metadata URL you copied. Keep both "Enable SSO" and "Enable SCIM" toggled off for now. Click Create Provider.
A green confirmation message indicates successful setup. If you encounter errors, verify you've followed each step correctly or contact support through the chat widget.
Configure attribute mapping
Attribute mapping tells Claras where to find essential information about your team members. SSO authentication will fail without proper attribute configuration.
In Claras, click the ⋮ next to your provider and select Edit. Note the three values under "Attribute Mapping". We recommend keeping these default values.
Return to Entra's Single Sign-on page and click Edit next to "Attributes & Claims".
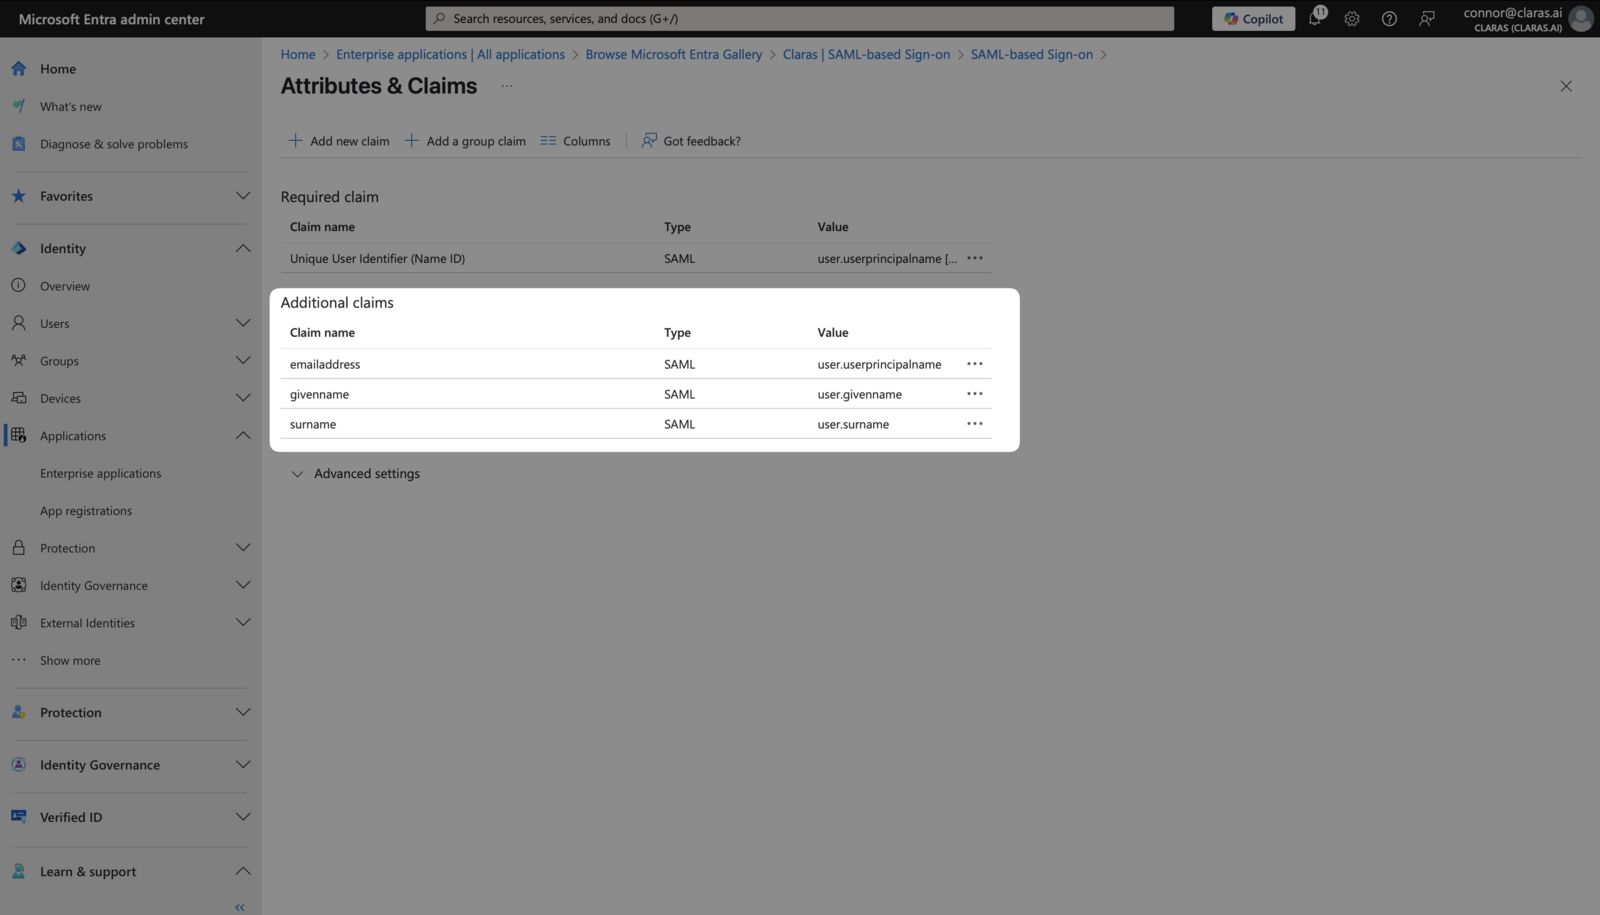
Delete all existing "Additional claims" using the ⋮ menu for each claim. Your page should show only the required claim.
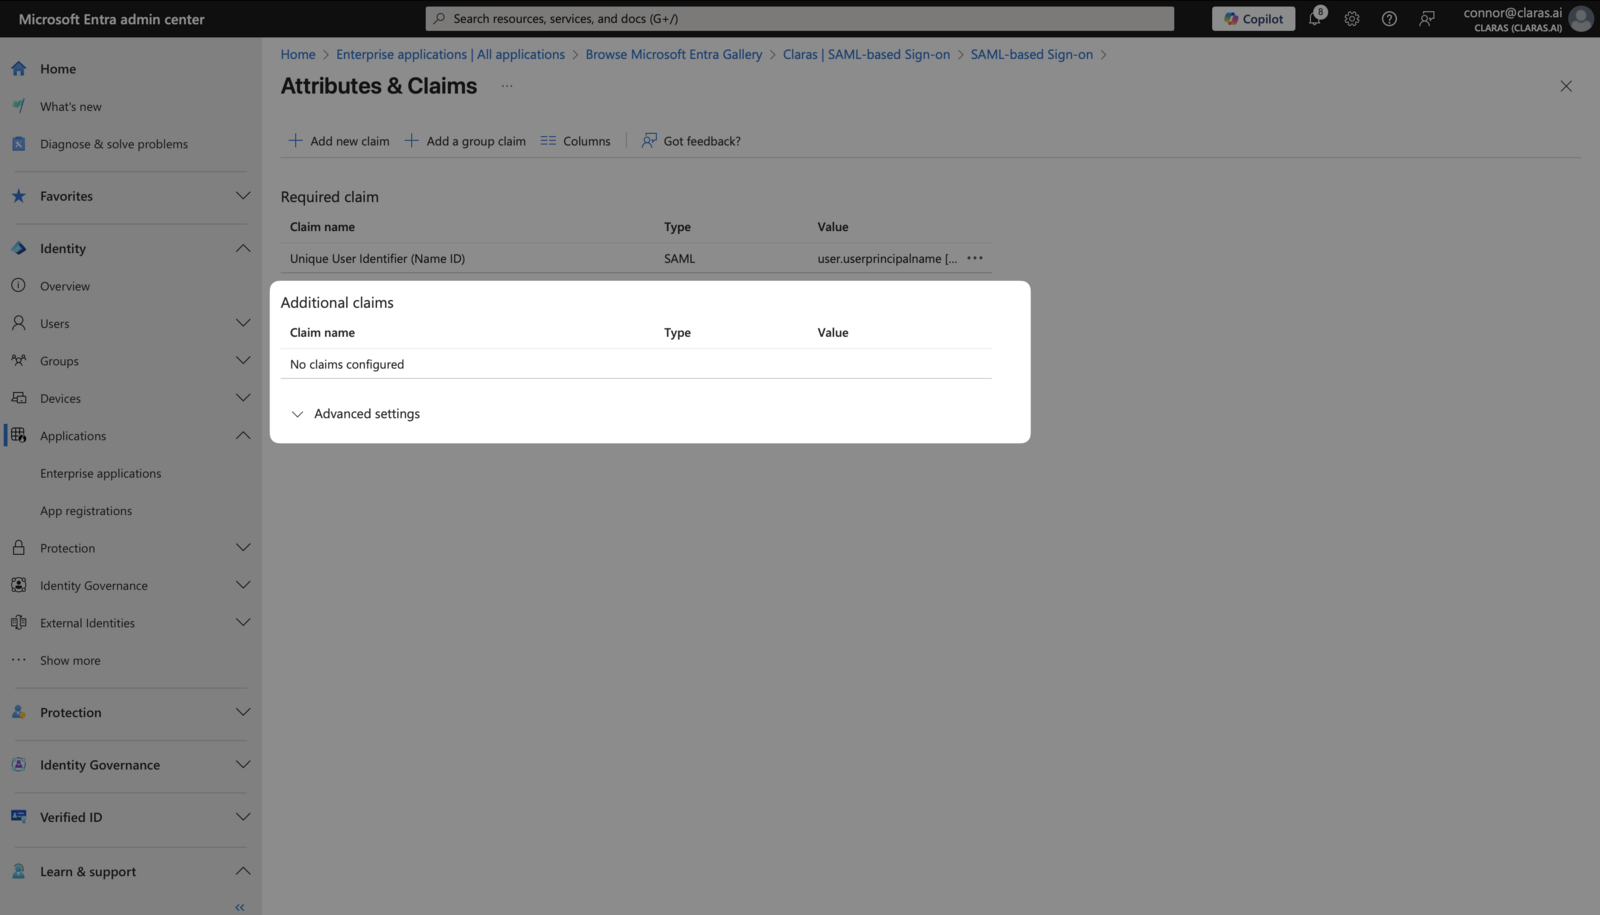
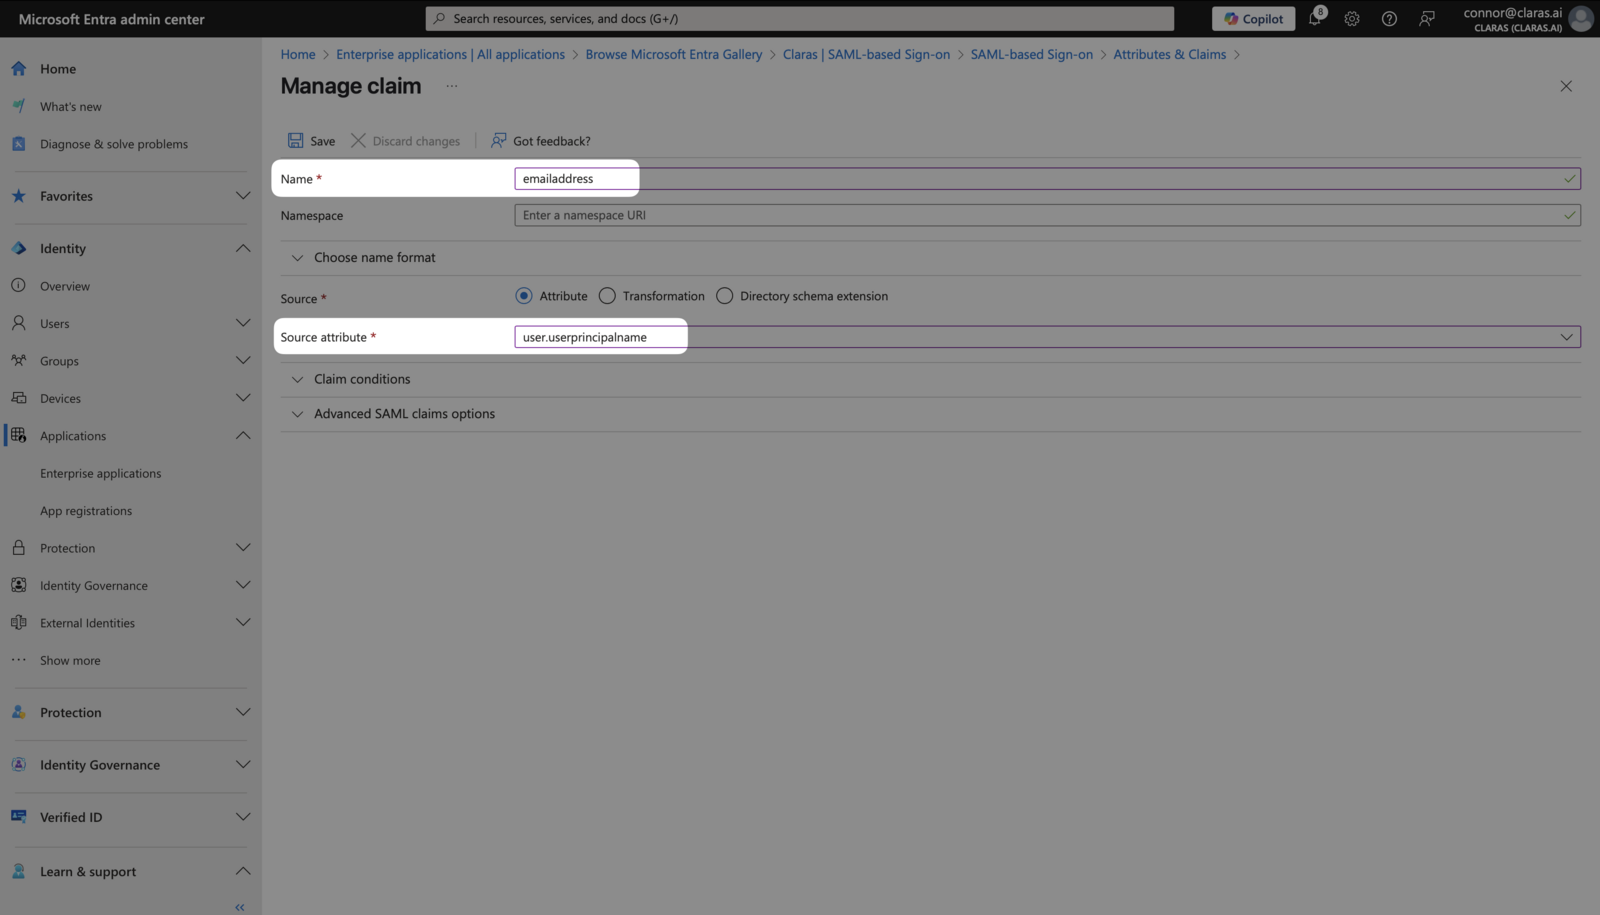
Create three new claims using + Add new claim. Configure each exactly as shown:
Claras value | Name | Source attribute | Description |
|---|---|---|---|
emailaddress | emailaddress | user.userprincipalname | Email address |
givenname | givenname | user.givenname | First name |
surname | surname | user.surname | Last name |
The "Name" field must exactly match the Claras value. Leave the "Namespace" field blank for all claims.
Your completed Attributes & Claims page should look like this:
If you modified the values in Claras, click Update Provider to save them.
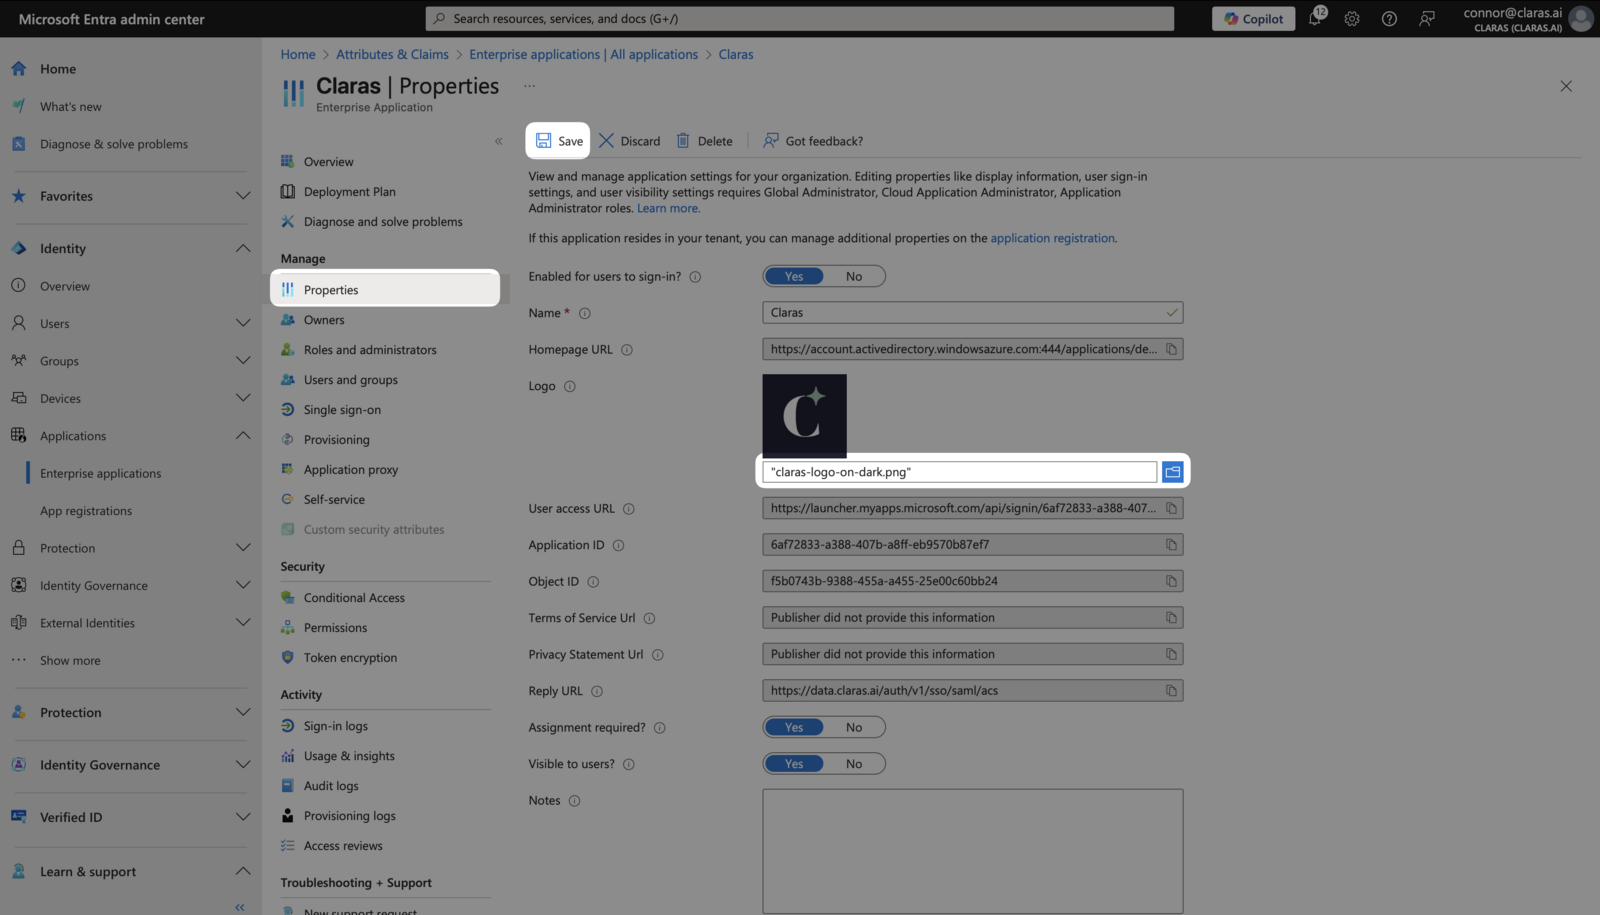
Set provider properties
Navigate to Manage → Properties in your Entra enterprise application. Download the Claras logo and upload it as the application logo.
Choose whether assignment is required for application access. Either option works with Claras. Review Frequently Asked SSO Questions to understand the implications of each choice.
Save your changes.
Enable SSO in Claras
First make sure your domain(s) are linked to your provider. Do this by selecting the provider from the dropdown.
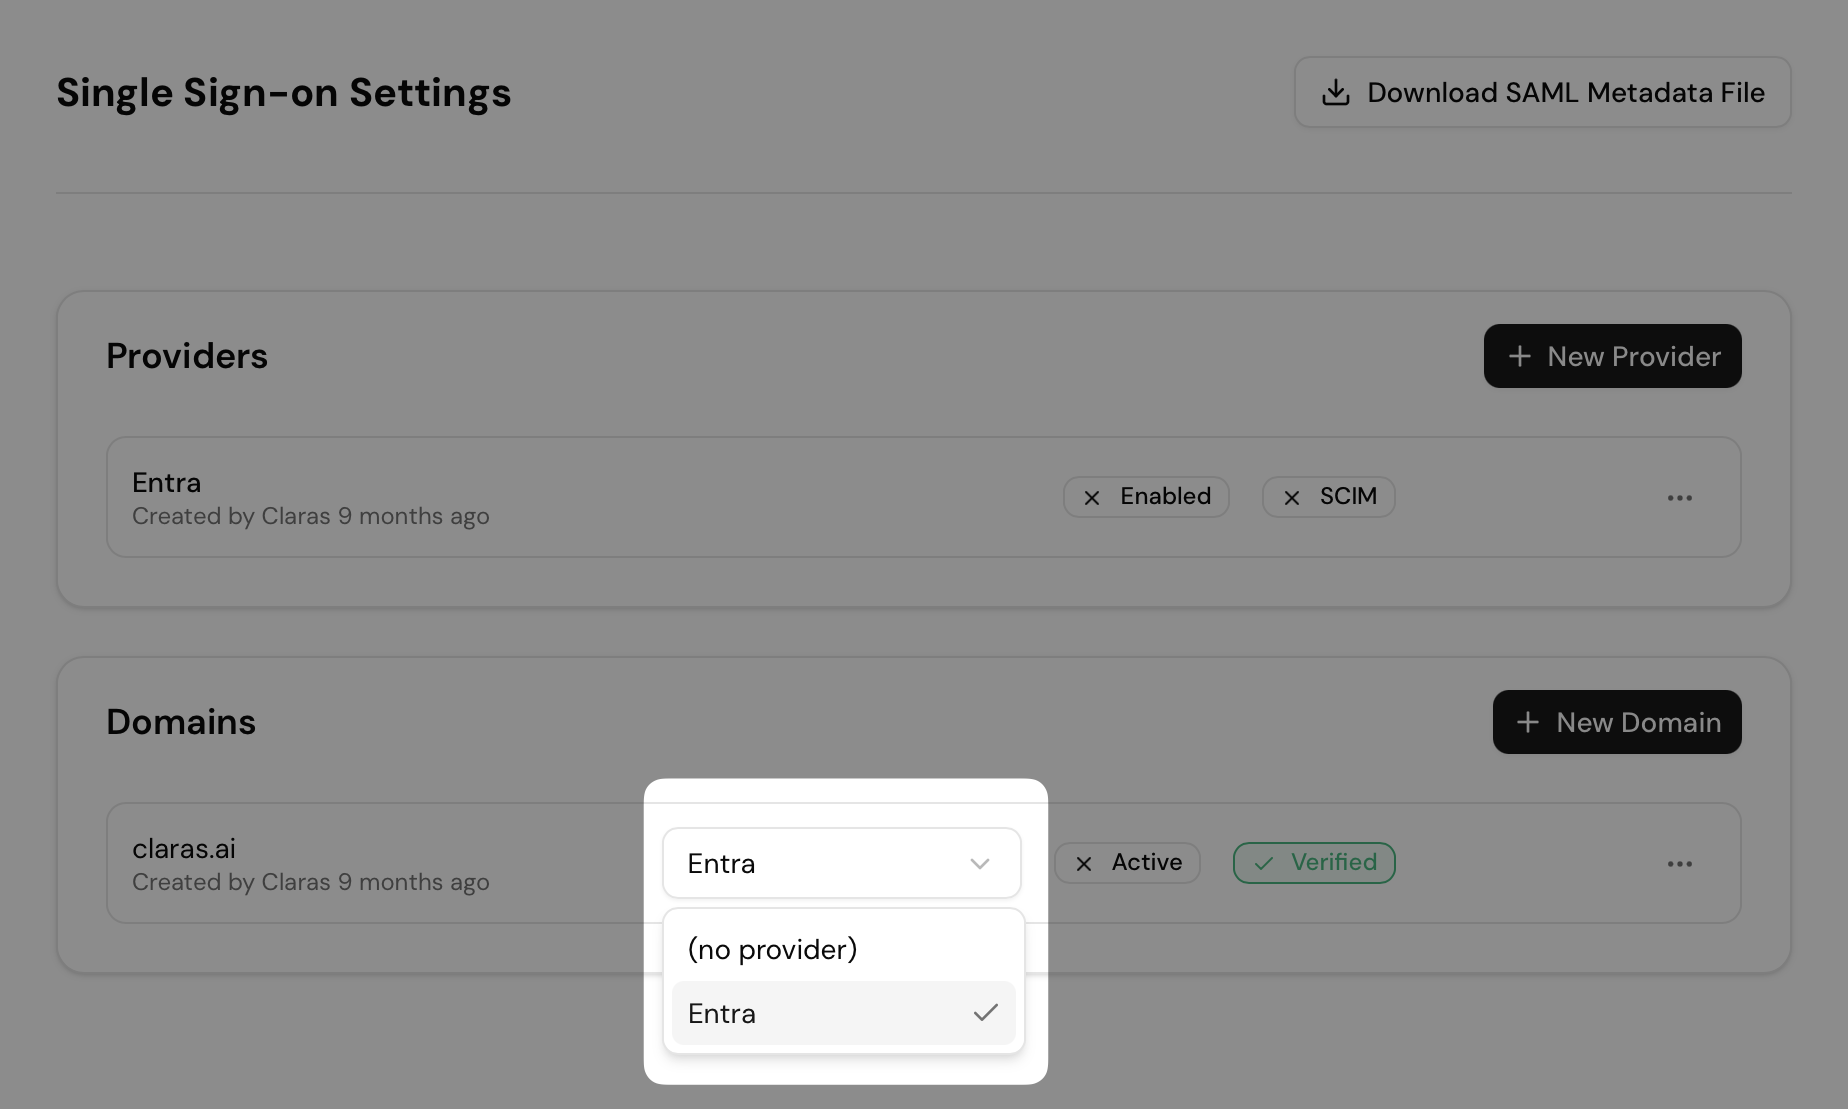
Verify your domains show "Verified" status. Enabling a provider without a verified domain will cause all login attempts to fail.
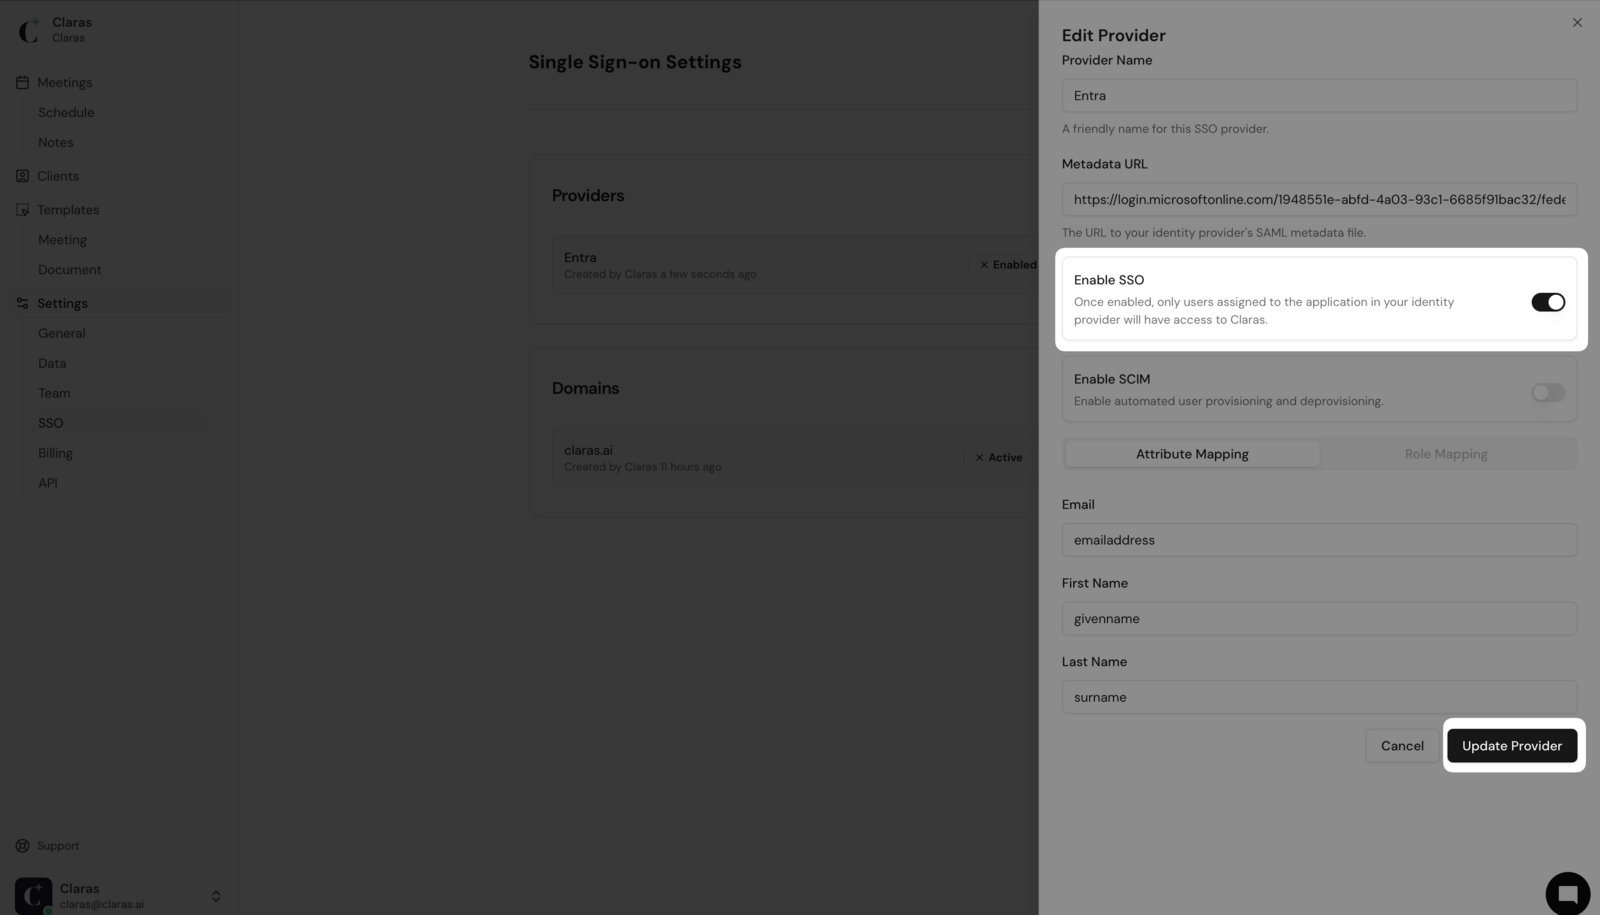
When ready to activate SSO, return to the SSO page in Claras and edit your provider. Toggle Enable SSO on and click Update Provider. The provider will display a green "Enabled" badge, and your linked verified domains will become "Active".
Your team can now sign in using their Microsoft accounts through the Office 365 app launcher, the User access URL, or Claras's standard login page. As an administrator, you can test the login flow immediately even without explicit assignment.
If you have existing team members in Claras, review Frequently Asked SSO Questions before enabling SSO. Inform your team about the upcoming changes to avoid confusion.
Next steps
With SSO enabled, you can manually grant access through the "Users and groups" tab in Entra, or configure automatic provisioning using SCIM. Review Frequently Asked SSO Questions for additional guidance on managing your SSO deployment.
Last updated 28th January 2026 by Connor