Update Client Profile
The Clients page is your central hub for managing advice documents in Claras. It brings together client details, file notes, documents, and insights in one place, so your team can work from the same information at all times.
From here you can:
Add and manage clients.
See past and future meetings.
Update the properties filter for a different view.
Click a client’s name to open their full profile.
View Clarity+, a live client summary.

This page covers:
Adding clients.
Viewing client meetings.
Uploading files to update Clarity+.
Editing Clarity+ directly.
Merging duplicate clients.
Adding a new client
Go to Clients and click New Client.
Enter their name and assign them to an adviser.
Click Create to save.
Keep client names consistent with your CRM for easy cross-referencing
Import clients from a CSV
If you have an existing client list, you can import multiple clients at once instead of adding them individually. This is useful when onboarding your practice or migrating from another system.
To import, go to Clients and click Import in the top right corner. Your CSV file should use the following three columns:
Client Name
Client Email (optional)
Adviser Name
Viewing Client Meetings
Each client profile includes a Meetings tab that displays all meetings for that client, regardless of status. This makes the client profile the easiest way to find specific meetings, such as those still in "Draft" or "Processed" status that need attention.
To view meetings for a client, go to Clients, click into the client's profile, and select the Meetings tab.
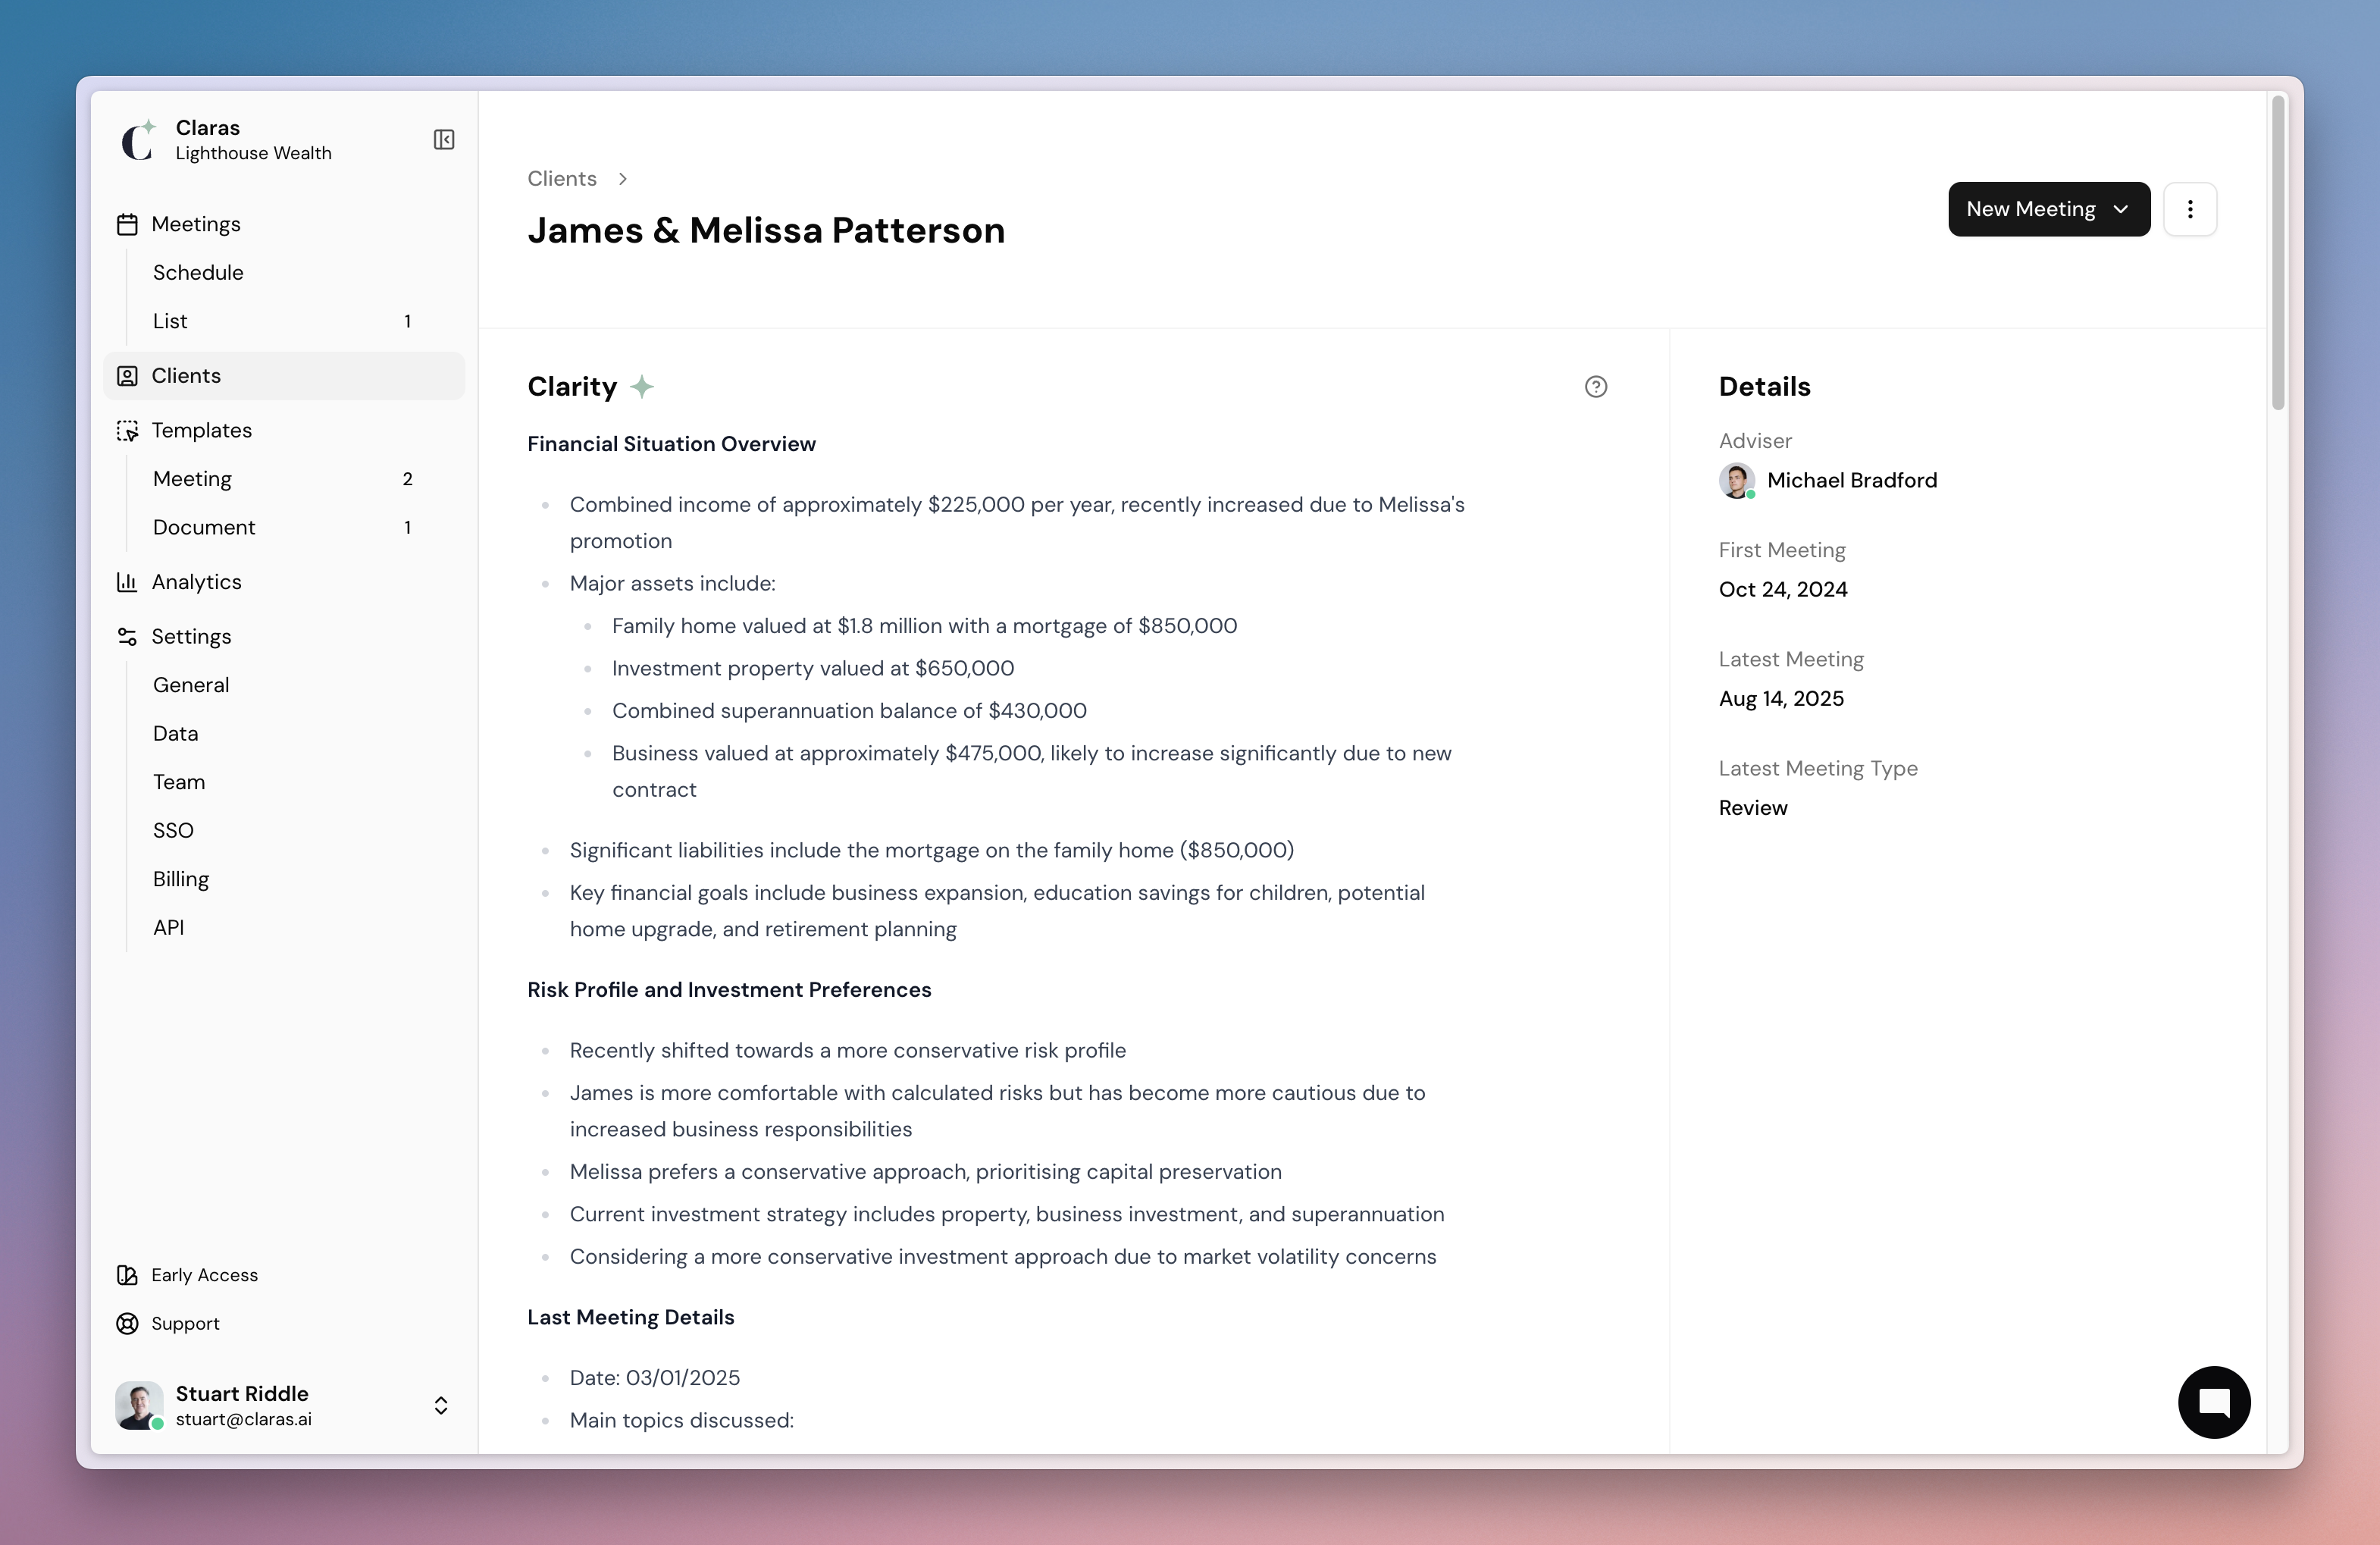
Update Clarity+
Each client profile includes Clarity+, a summary pulling key insights from file notes, documents and files. This gives you a live summary of each client, so you can:
Stay across your clients as you grow.
Prepare for meetings so you walk in fully prepared.
Onboard new team members quickly.
Create documents with the right context already in place.
Upload client files
To populate Clarity+, upload key documents to the client profile. While uploading before your first meeting is ideal, you can add files at any time and Claras will update the record accordingly. These files give Claras the context it needs to build a complete picture of the client’s situation, and make your file notes and documents more accurate.
Claras analyses information from Word, PDF, Excel, email, and image files, prioritising the most recent data so your summaries reflect the client’s current position.
Files that work best include:
Previous file notes – provides historical client discussions.
Superannuation or investment statements – supply up-to-date balances and holdings.
Statements of Advice (SOAs) – capture past recommendations and strategies.
Risk profiles – outline the client’s tolerance and preferences.
Forecasts – forward-looking context on cash flow, retirement, or investment scenarios.
Charts and graphs – summarising data from modelling tools.
To upload files:
Go to Clients and click into a client profile.
Scroll down to the Attachments section.
Click Upload file and select files from your computer.
Claras will process the files and update Clarity+.
Click the file to view the extracted information.
Click the 3-dot menu > Edit on a file to rename it or adjust the date
Claras cannot process password protected files - remove before uploading

Edit Clarity+ directly
If you have existing client information that isn't contained in a document, you can type it directly into the Clarity+ record. Click into the Clarity+ content on the client's page to open the editor. Your changes save automatically as you type. For more detail on manual editing and when editing is available, see Clarity Plus.
Merging Duplicate Clients
The merge feature combines two client profiles into one, moving all file notes, documents, attachments, and Clarity+ data from the source client into the target client. This is useful when the same client has been added more than once.
To merge clients:
Go to the client profile you want to remove (the source client).
Click the
⋮menu at the top and select Merge into.Select the client you want to keep (the target client) and click Merge.
If you made a mistake, you have 8 seconds to click Undo before the merge is finalised.
Next
Invite your team so everyone works from the same templates and processes
Last updated 13th June 2026 by Dusty