
Custom Export Styles
This guide explains how to set up export style templates so Word exports use your headers, footers, and styles.
You need full access to Settings to upload, reorder, or remove export styles. Anyone who can edit document templates can choose which style a template uses when it exports.
Overview
Export style templates are Word (.docx) files that hold your practice branding for DOCX exports. They control stylesheets and document properties such as margins, page size, headers, and footers. The body content still comes from Claras when you export.
You can keep more than one style under Branding. The style at the top of the list is the practice default for file notes, advice documents, and the client record DOCX exports. Drag styles to reorder them. When a particular advice document needs a different look, pin a style on that document template instead of changing the practice default.
On upload, Claras checks that the style names exports rely on are present. If your file only used ordinary formatting, Claras prepares those named styles so headings, tables, and body text can still pick up your branding where possible. Named styles that already have real formatting are left unchanged.
Creating a template document
You have two options:
An existing DOCX file. Use any file that already contains your styles, headers, and footers. Results can vary depending on how complex the original formatting is. For more consistent results, start from the example template below and customise it with your preferred styles.
Starting from scratch. You can download our example template file that contains a base set of styles and customise from there.
You do not need to worry about the body content of the file. Claras replaces that with the content you are exporting. Save your custom styles, margins, page size, header, and footer settings before you upload.
Style naming conventions
We will look for styles that use the following names. If a particular style isn't coming through as expected, please double check its name matches a name in the list below.
Paragraph styles
Normal
Body Text
First Paragraph
Compact
Title
Subtitle
Author
Date
Abstract
AbstractTitle
Bibliography
Heading 1
Heading 2
Heading 3
Heading 4
Heading 5
Heading 6
Heading 7
Heading 8
Heading 9
Block Text [for block quotes]
Footnote Block Text [for block quotes in footnotes]
Source Code
Footnote Text
Definition Term
Definition
Caption
Table Caption
Image Caption
Figure
Captioned Figure
TOC Heading
Character styles
Default Paragraph Font
Verbatim Char
Footnote Reference
Hyperlink
Section Number
Table style
Table
You don't need to setup every style. You can just provide common styles such as headings, lists, table etc.
Table styles
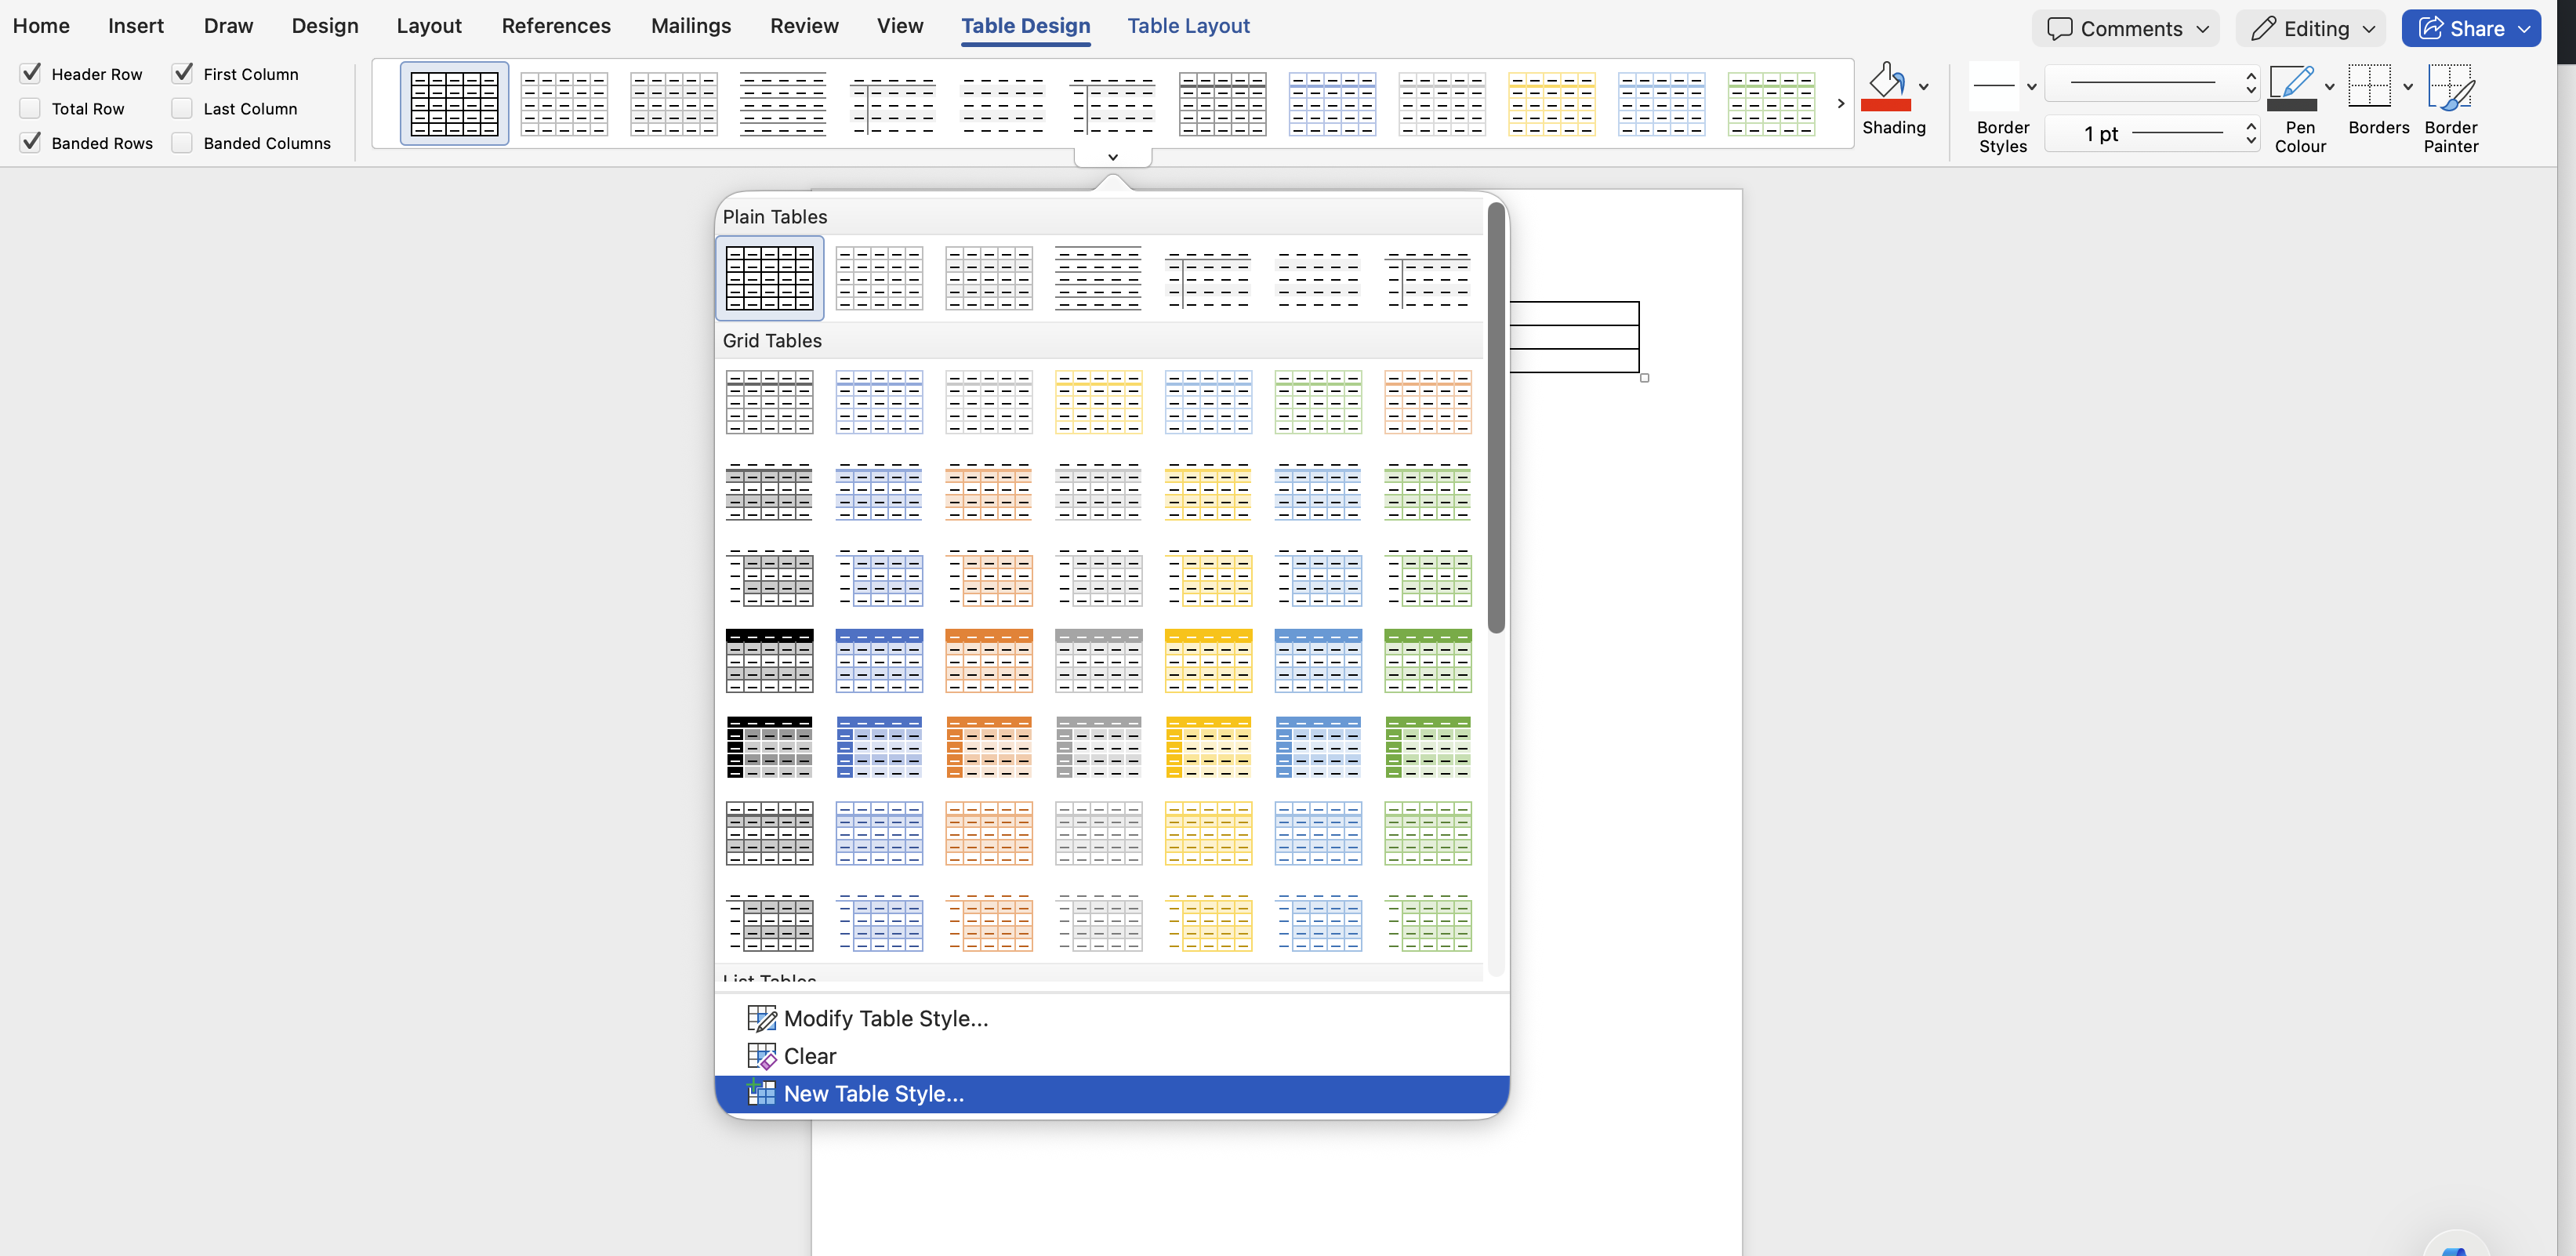
For table styles to work, you must specifically have a table style named "Table". Begin by creating a table. Select the styles dropdown from the Table Design tab, and click New Table Design.
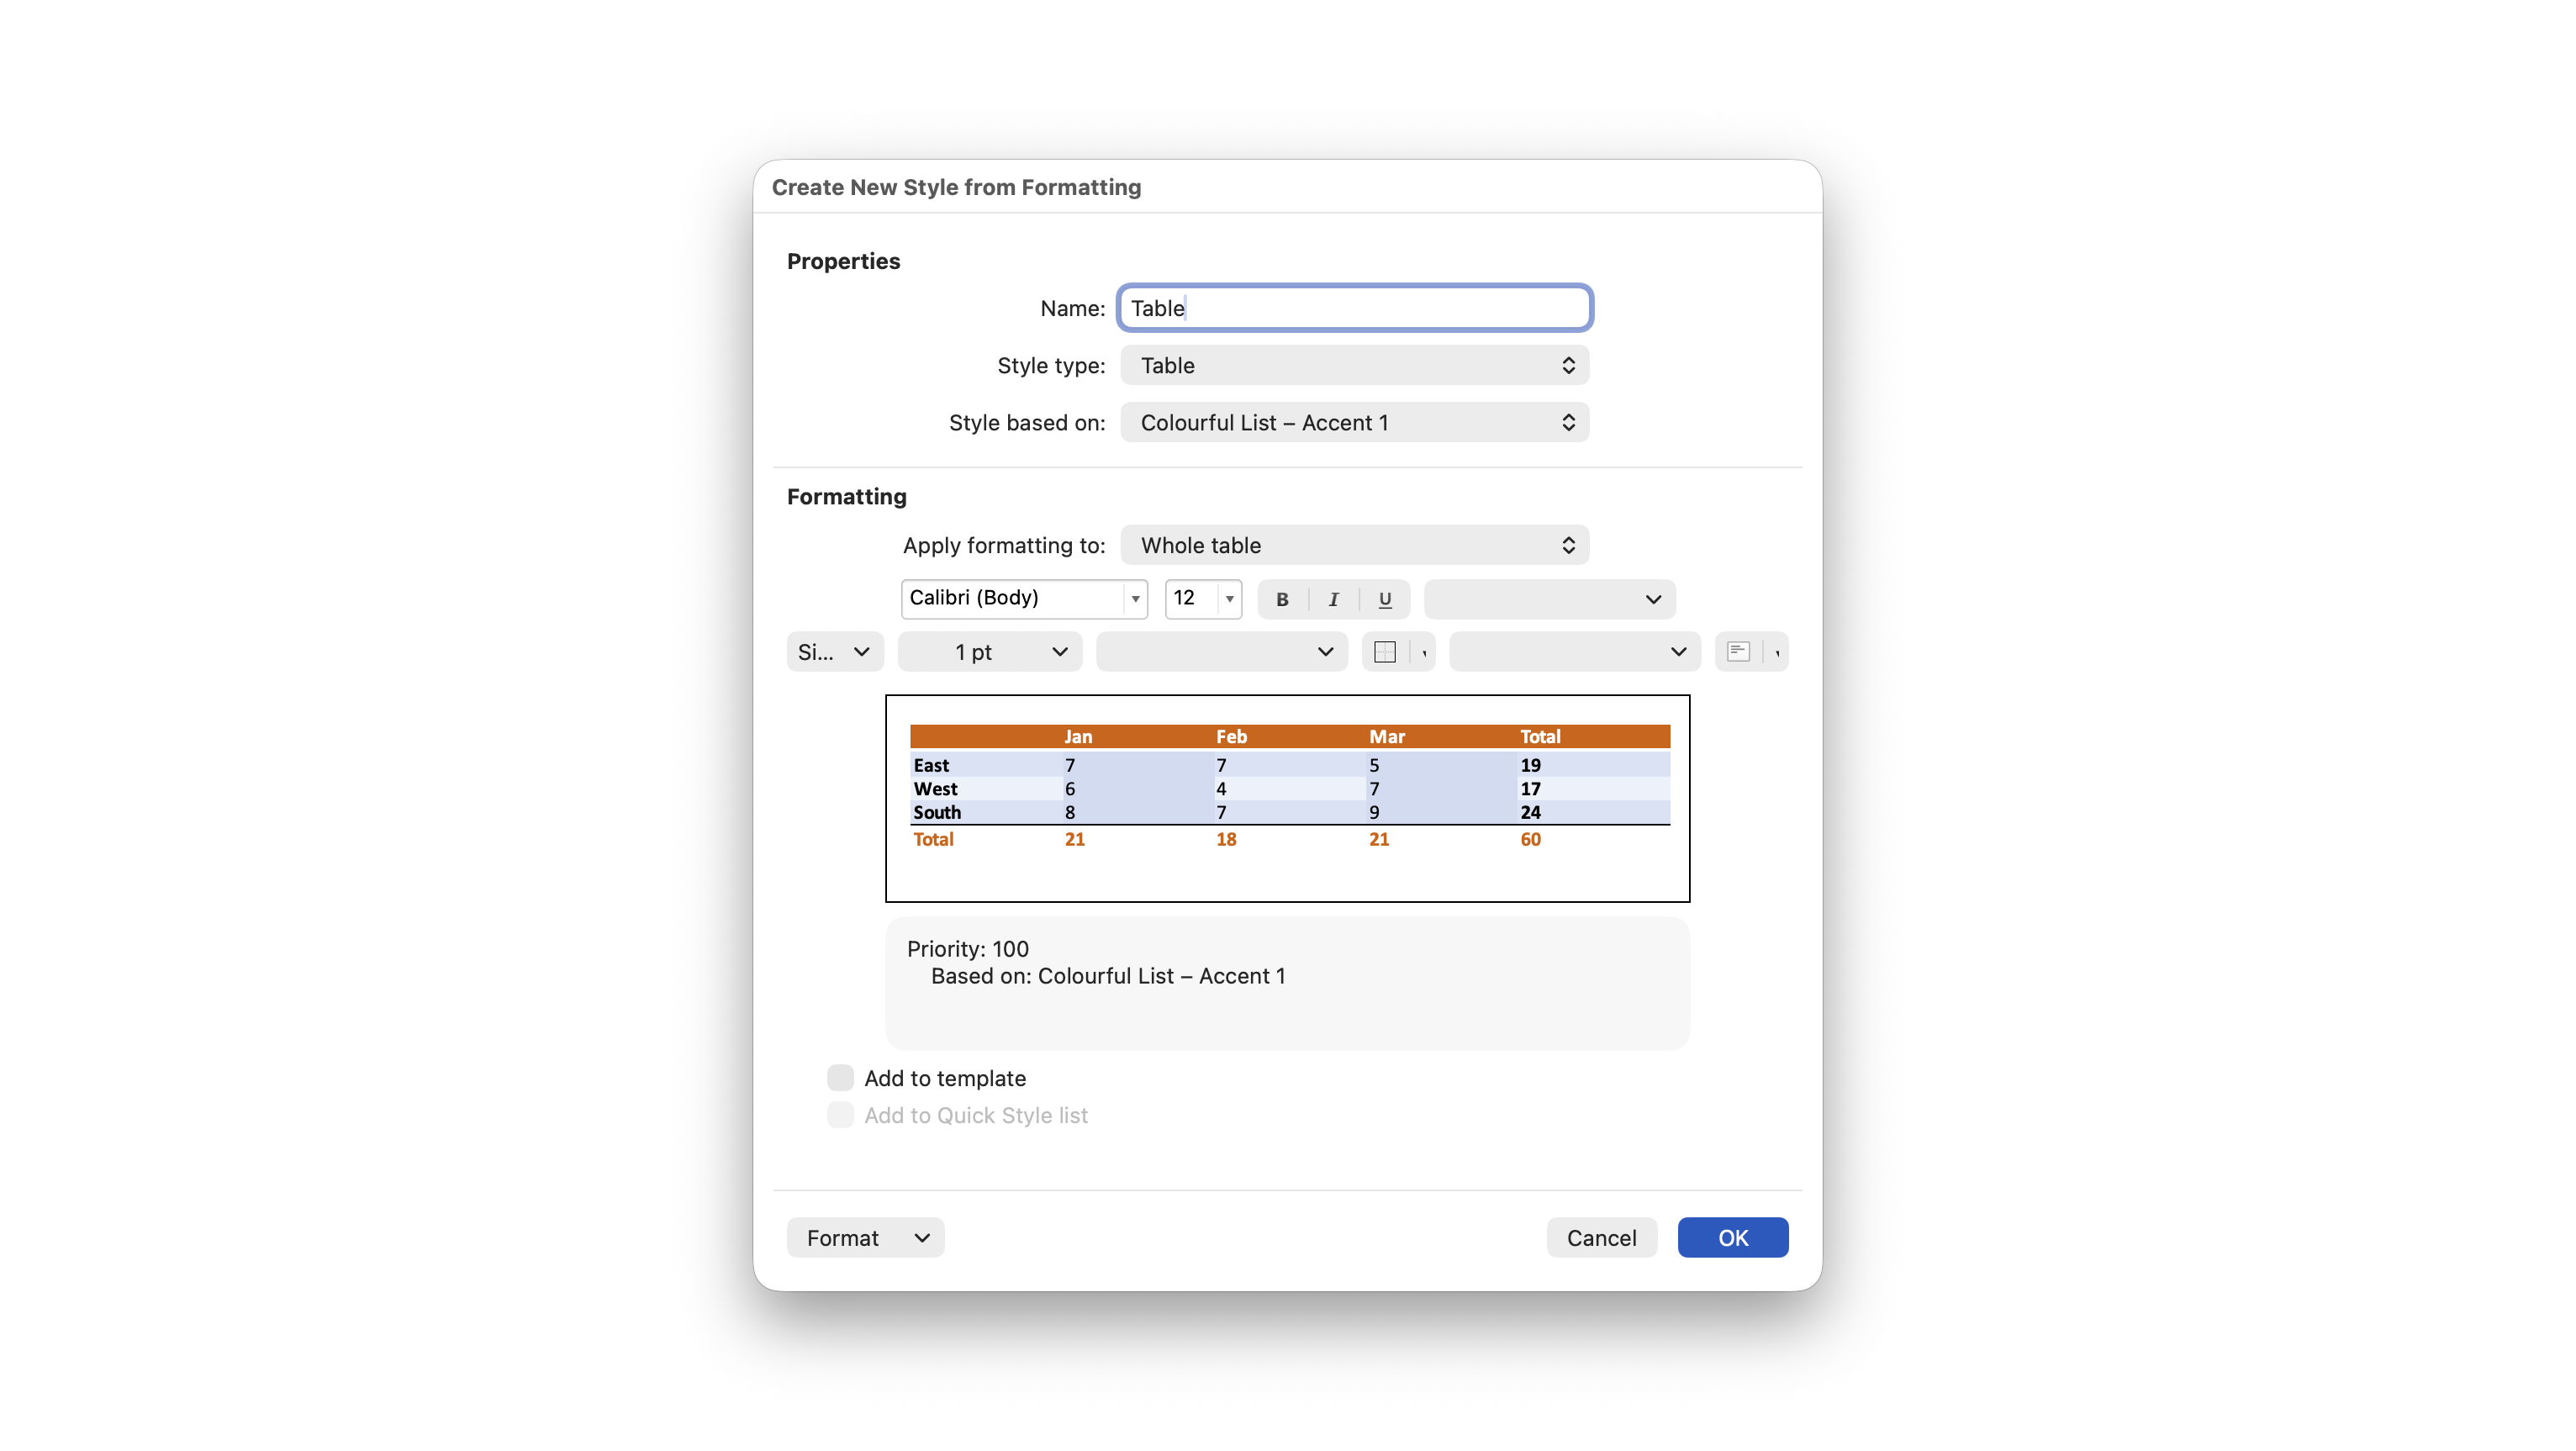
Ensure the style is called exactly "Table". You may wish to choose an existing table style to base this on as a starting point. Once you've configured your table style, click OK.
Uploading and managing styles
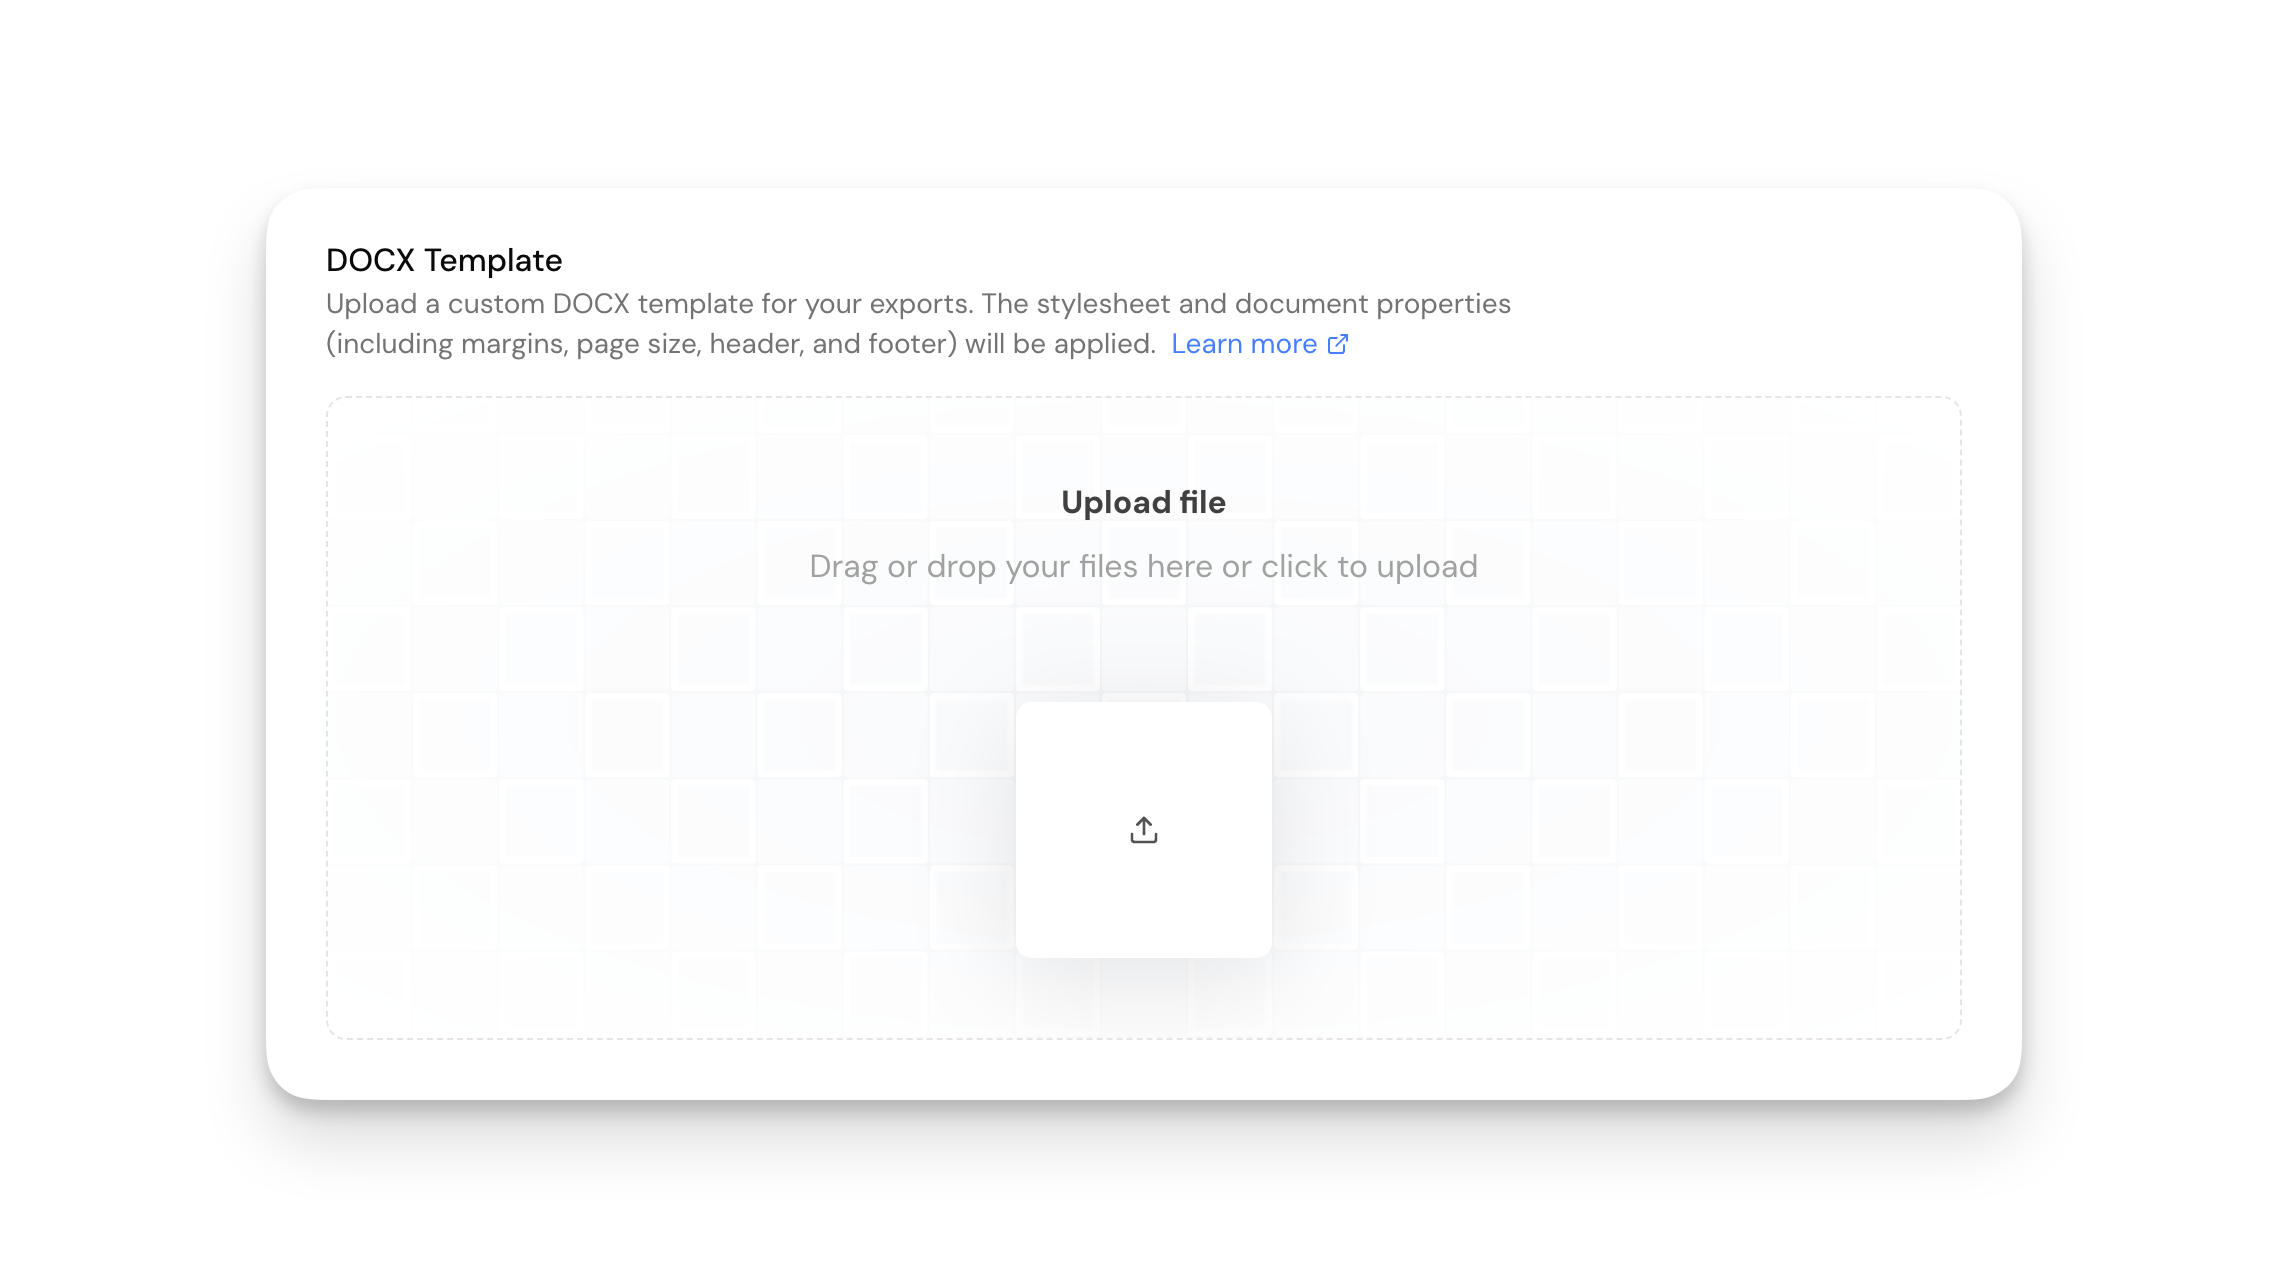
Navigate to Settings → Branding. Under the Documents section, upload one or more .docx style templates.
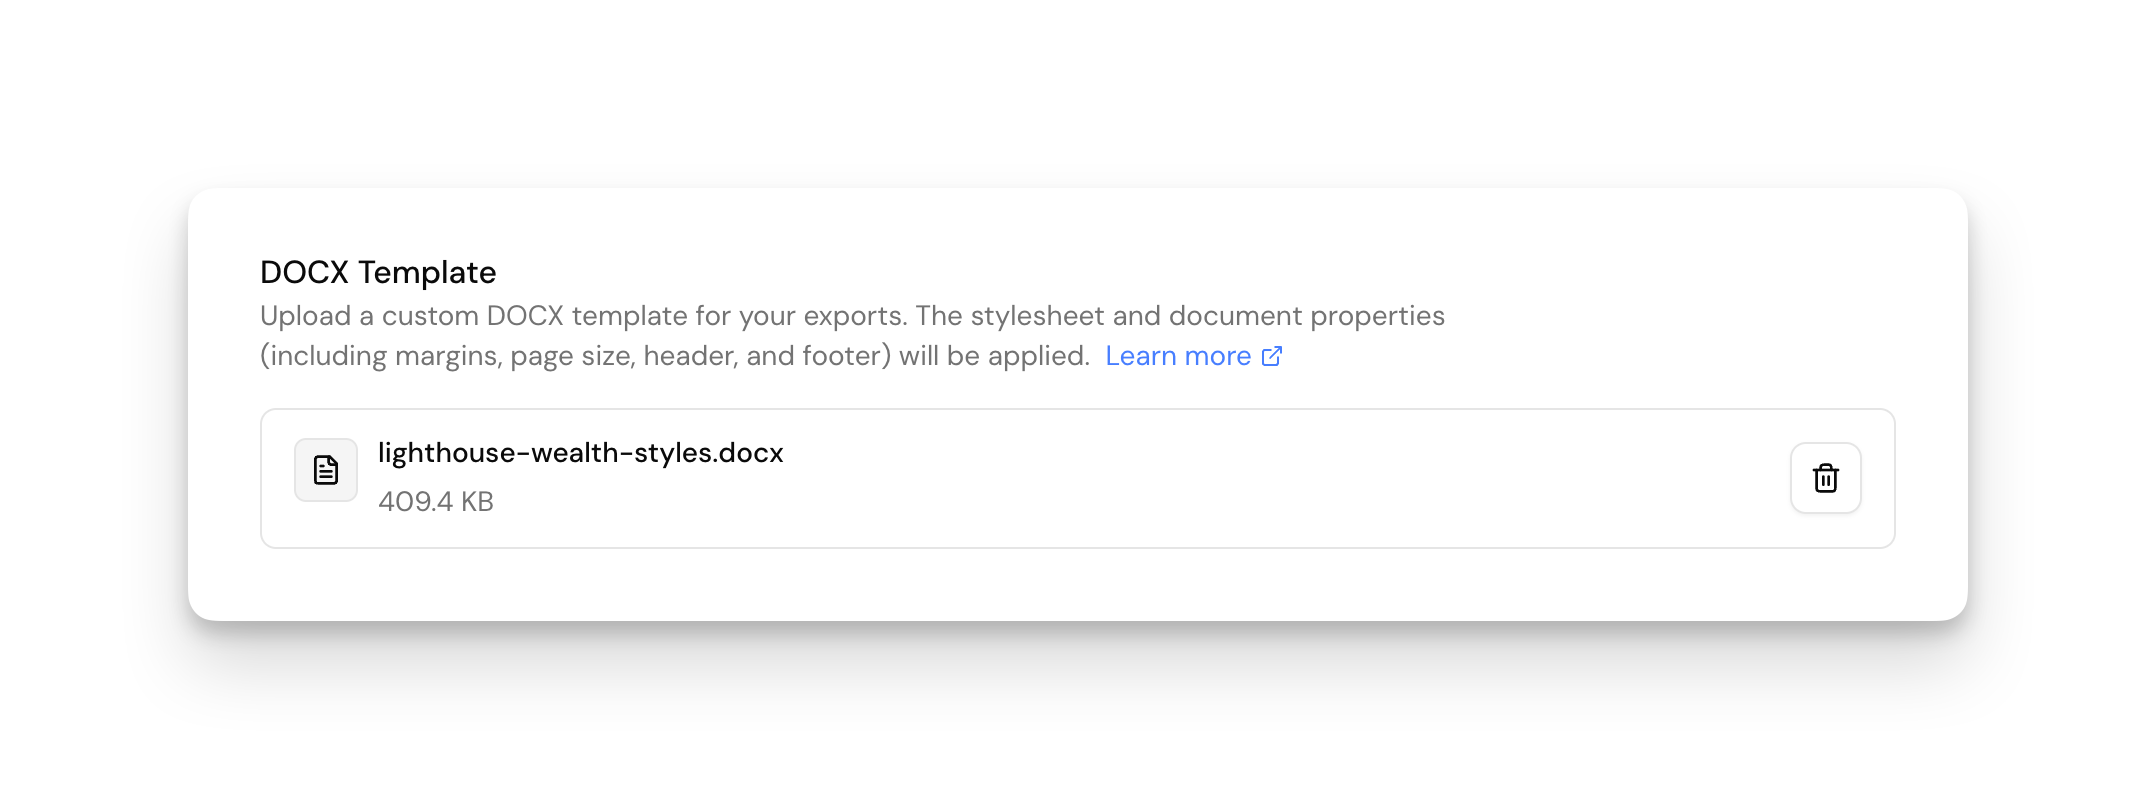
Each uploaded style appears in a list. The top style shows a "Default" badge. That style is used whenever nothing more specific is chosen.
Reorder. Drag a style by its handle to move it. Dropping a style at the top makes it the new practice default.
Download. Use the download control on a row to save a copy of that template.
Delete. Use the trash control to remove a style. Document templates that were pinned to it fall back to the practice default automatically.
DOCX exports may take a little longer to process (about 10 to 15 seconds) when a style template is applied.
Upload a valid .docx that opens in Word. Files that are not readable Word documents are rejected and not linked as styles.
Choosing a style on a document template
Open a document template under Templates. The "Export style" field controls which branding is used when documents from that template are exported as Word.
Practice default. Uses whatever style is currently at the top of the Branding list. This is the usual choice.
A specific style. Pins that template to one of the styles you uploaded, even if you later reorder the Branding list.
Use Manage export styles under the field to open Branding and upload or reorder styles. File notes and the client record exports always use the practice default, because they do not have a document template pin.
Frequently asked questions
How do I remove a style?
Click the delete control with the trash icon next to the style on Settings → Branding. Document templates that used that style fall back to the practice default.
How do I update a style?
Delete the style you want to replace, then upload the new .docx. If the deleted style was the practice default, the next style in the list becomes the default. If nothing remains, exports use Claras standard formatting until you upload again.
Can I have more than one style?
Yes. Upload as many as your practice needs. Keep the everyday branding at the top as the default, and pin special styles on individual document templates when a document type needs a different letterhead or look.
Where do styles get applied?
Styles are used when you:
Export a file note as a DOCX file (practice default)
Export a document as a DOCX file (pinned style if set, otherwise practice default)
Export a client record as a DOCX file (practice default)
Will it use my different first-page header and footer?
Yes, your first page header and footer designs will be used.
Can I use logos and graphics in my documents?
Yes. You can insert logos and graphics into your template's headers and footers, and they'll appear in all exported documents. This is useful for adding company branding, logos, or visual elements that should appear consistently throughout your documents.
If you've set up different headers and footers for the first page in your template (for example, a different logo or letterhead on page one), Claras will preserve that formatting when generating documents.
Can I insert page breaks?
Yes. You can add page breaks directly from the editor toolbar when editing templates, file notes, or documents. Page breaks are included in the DOCX export, so you don't need to configure page break rules in your DOCX template styles.
Can I add page numbers to my documents?
Yes. Add page numbers to the header or footer of your DOCX template, and they will carry through to exported documents. If page numbers don't appear as expected after exporting, you may need to update them manually in Microsoft Word by right-clicking the page number field and selecting Update Field.
Can I include a table of contents?
Table of contents formatting may not carry through reliably in DOCX exports. If you need a table of contents, add one manually in Microsoft Word after exporting the document.
What's the difference between fixed text and square bracket instructions?
This applies to document templates rather than export style templates. In a document template, any normal text without square brackets is treated as fixed wording and appears in the generated document as written. Text wrapped in square brackets acts as an instruction for Claras to fill in with relevant content. For sections you want reproduced verbatim, such as disclaimers or standard paragraphs, write the text as plain text without square brackets. For longer fixed passages, a quick review of the output is recommended to confirm accuracy. See Creating Document Templates for more details.
Last updated 13th July 2026 by Connor