Enabling SCIM in Entra
This guide covers setting up SCIM (System for Cross-domain Identity Management) to automate user provisioning between Microsoft Entra and Claras.
Overview
SCIM automates user management for your Claras workspace through Microsoft Entra. While not required for SSO, SCIM provides significant benefits for larger teams: it creates profiles automatically before first login, syncs name and email changes instantly, archives profiles when people leave your organisation, and updates billing automatically as team members join or leave.
Without SCIM, you'll need to manually archive profiles when people leave, and they may retain access until you do so. Billing also requires manual adjustment.
Enable SCIM in Claras
Navigate to the SSO page in Claras and click the ⋮ next to your provider. Select Edit and toggle on Enable SCIM.
By default, all new profiles receive the "Adviser" role. For automatic role assignment based on your Entra groups, configure Role Mapping by entering group names for each role.
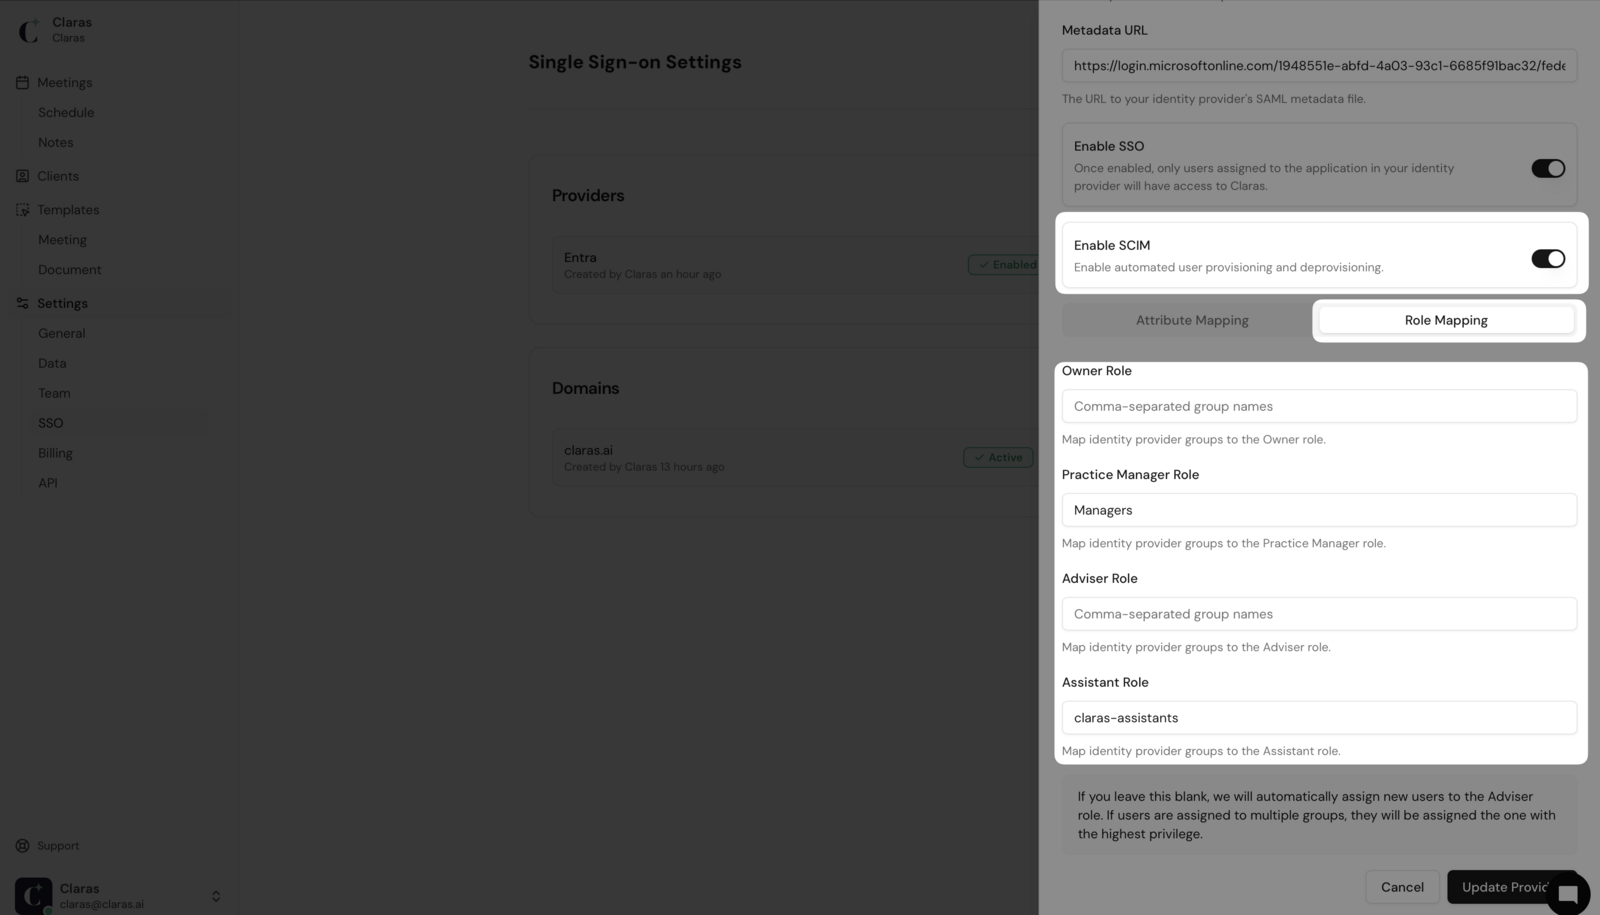
When using group-based role mapping, keep these considerations in mind:
Groups must be assigned to the enterprise application in Entra
Not all roles require mapping. Leave unused fields blank
Roles apply in privilege order: Owner > Manager > Adviser > Assistant
Mappings can be updated after initial setup, and existing profiles will update on the next sync
Profiles without matching groups retain their current role
For security, Owner roles cannot be downgraded automatically. Use the Team page instead
You can also leave role mappings blank and manually assign roles through the Team page as needed.
Click Update Provider after configuration. The provider will display a green "SCIM" badge without affecting existing SSO functionality.
Generate an API key
Navigate to Settings → API in Claras and click + New API Key.
Enter a descriptive name and select only the scim.full scope. Ensure rest.full remains deselected. You'll also need to select the provider you wish to enable SCIM for in the dropdown.
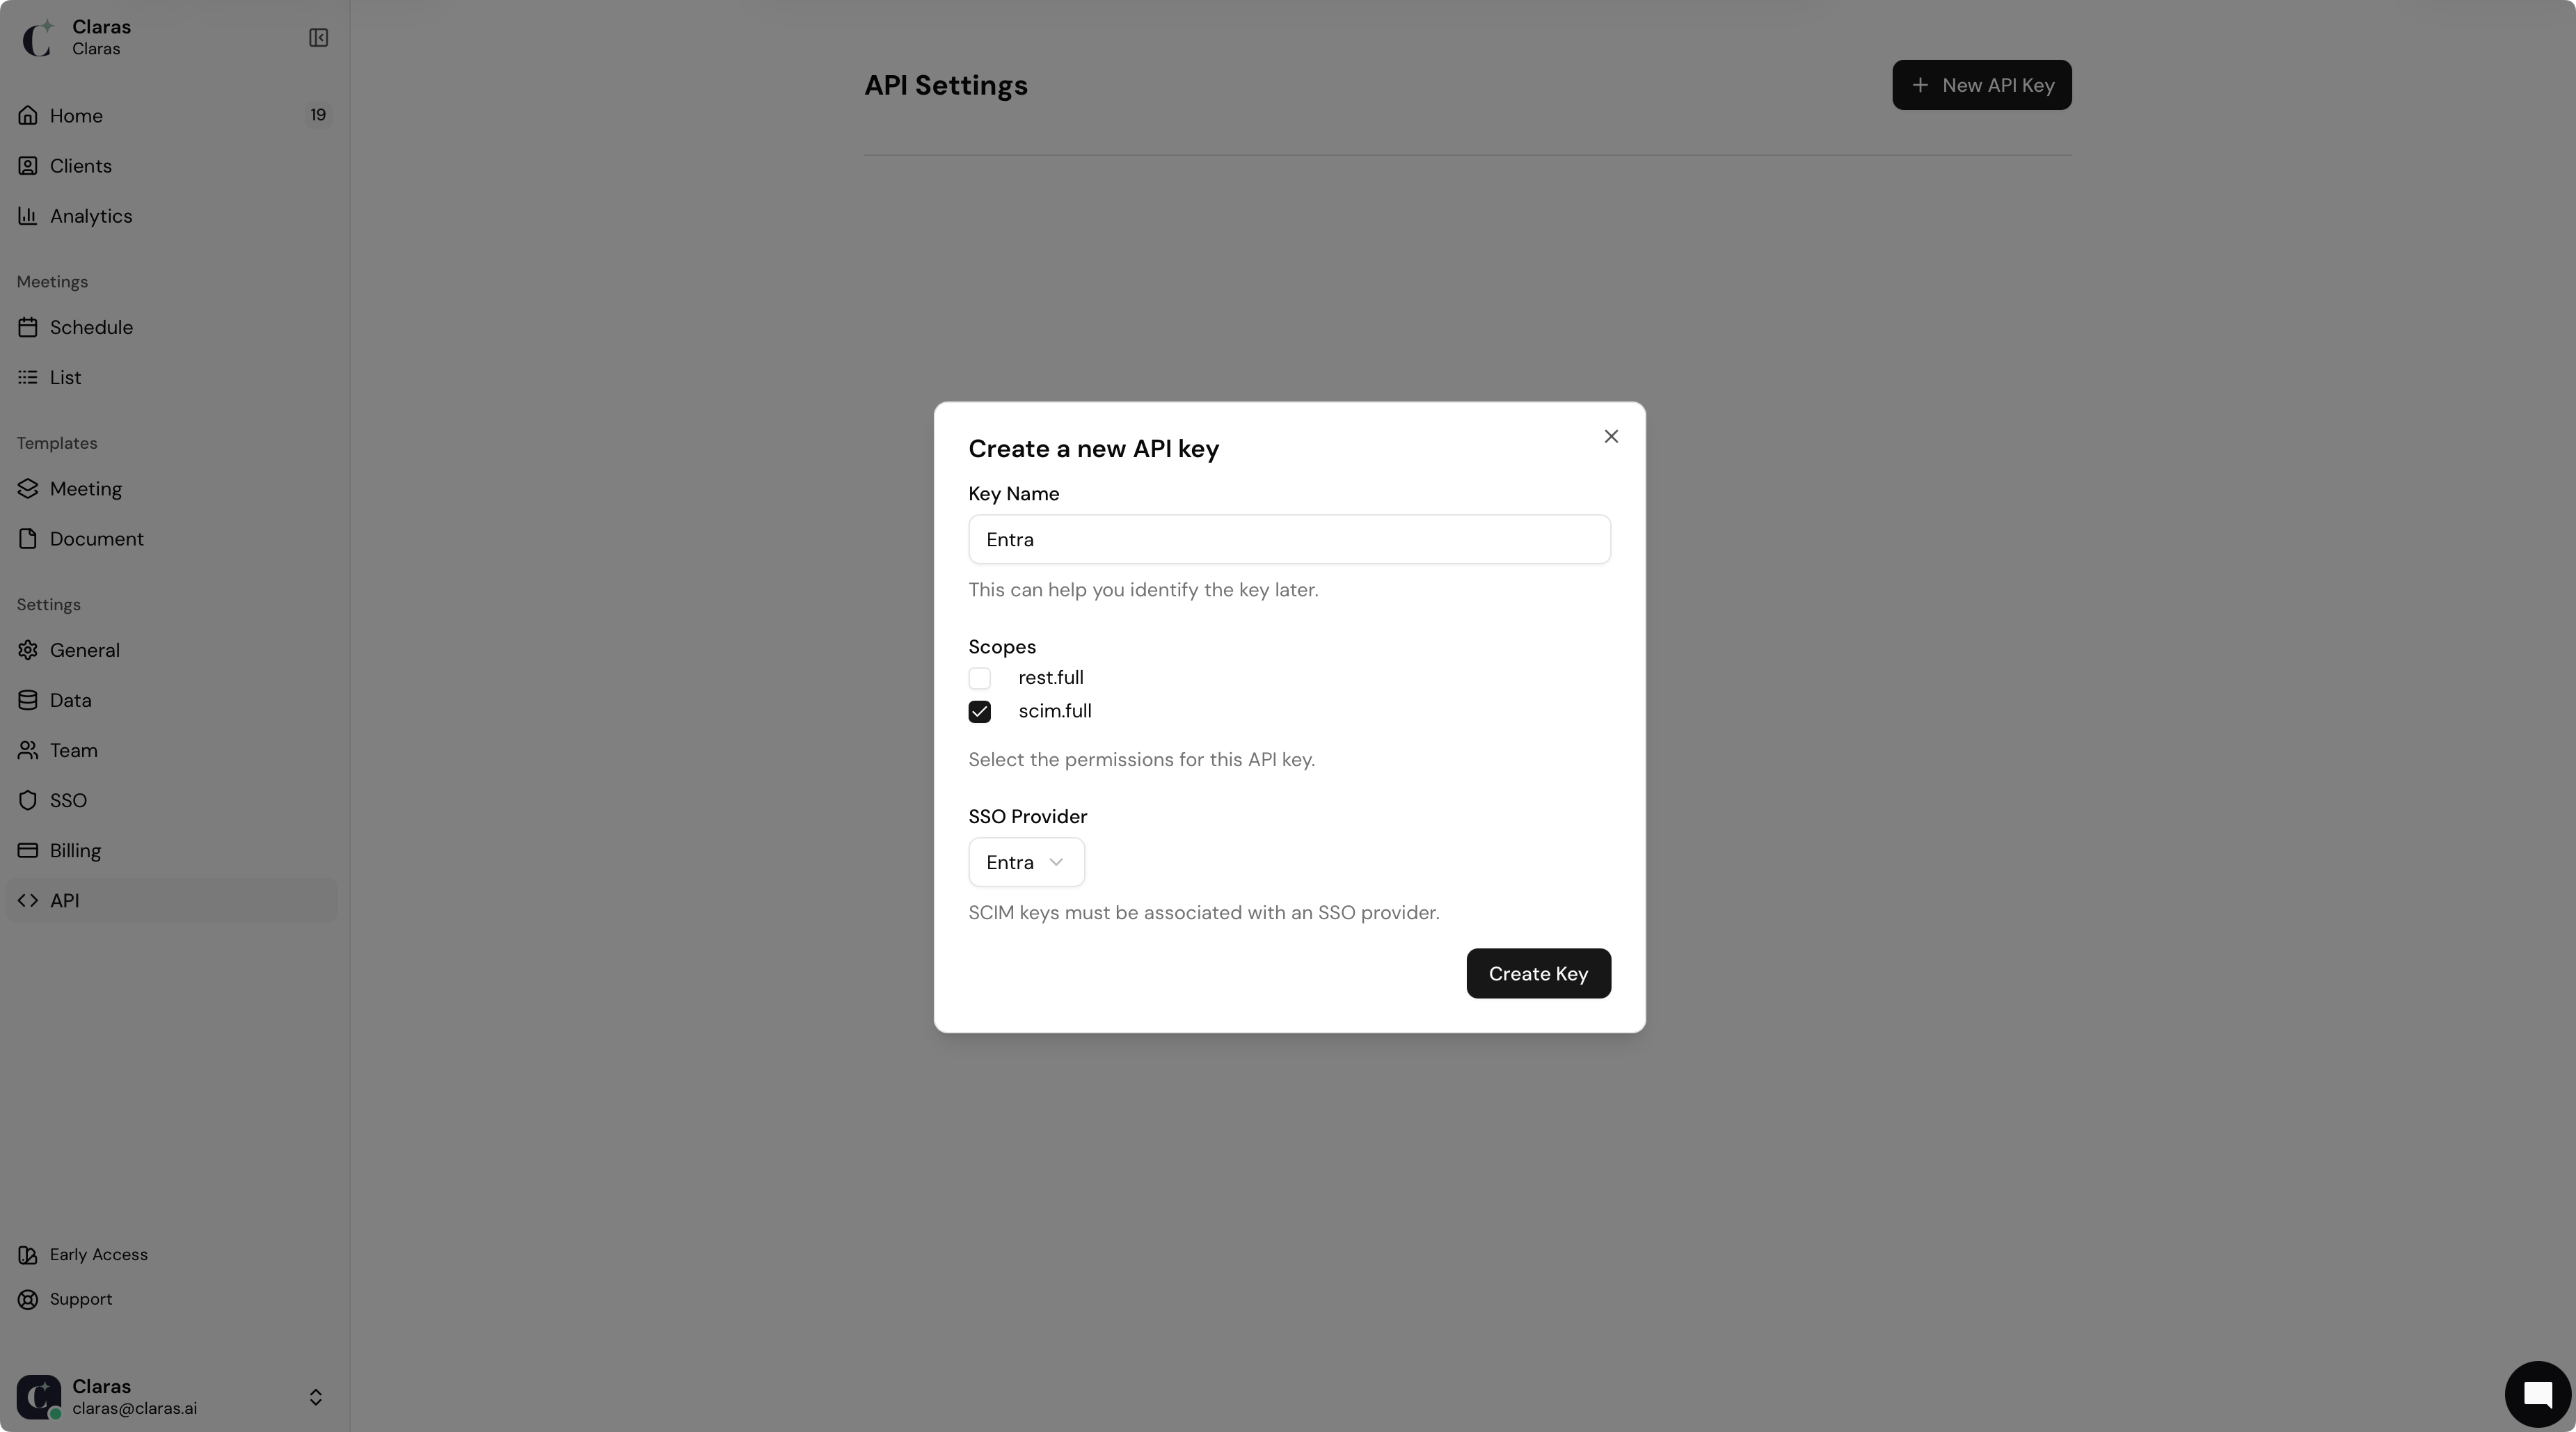
Create the key and immediately copy the value. This is your only opportunity to view the complete key.
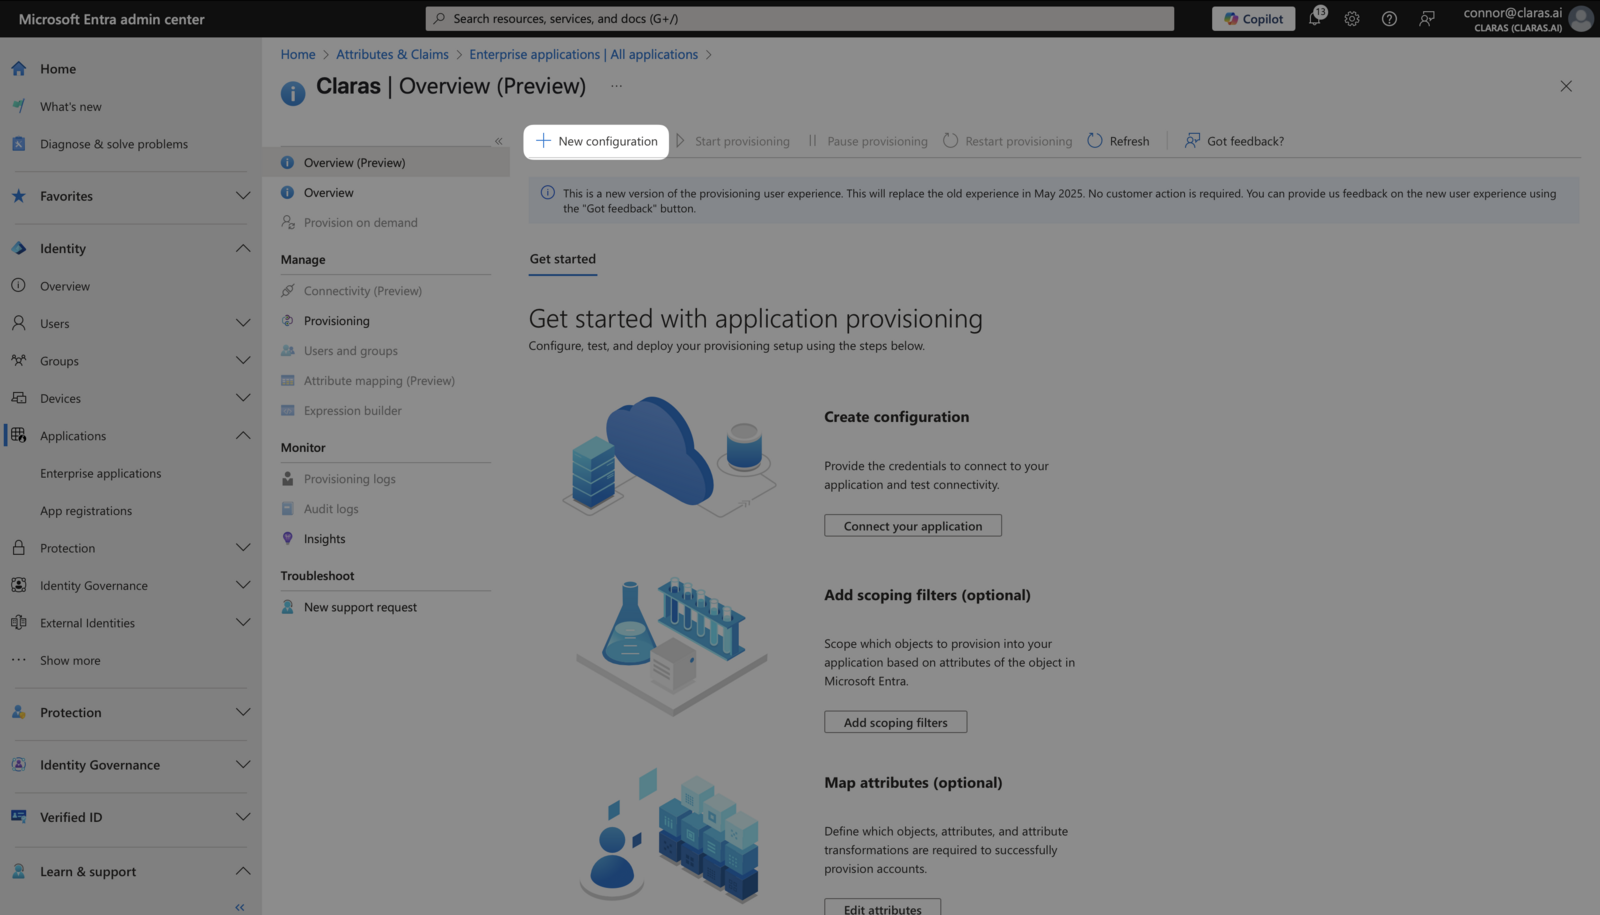
Setup the configuration
In your Entra Enterprise Application, navigate to Manage → Provisioning and click + New Configuration.
Configure the connection settings:
Secret Token: Paste the API key from Claras directly without modification
Tenant URL: Enter
https://claras.ai/api/scim/v2
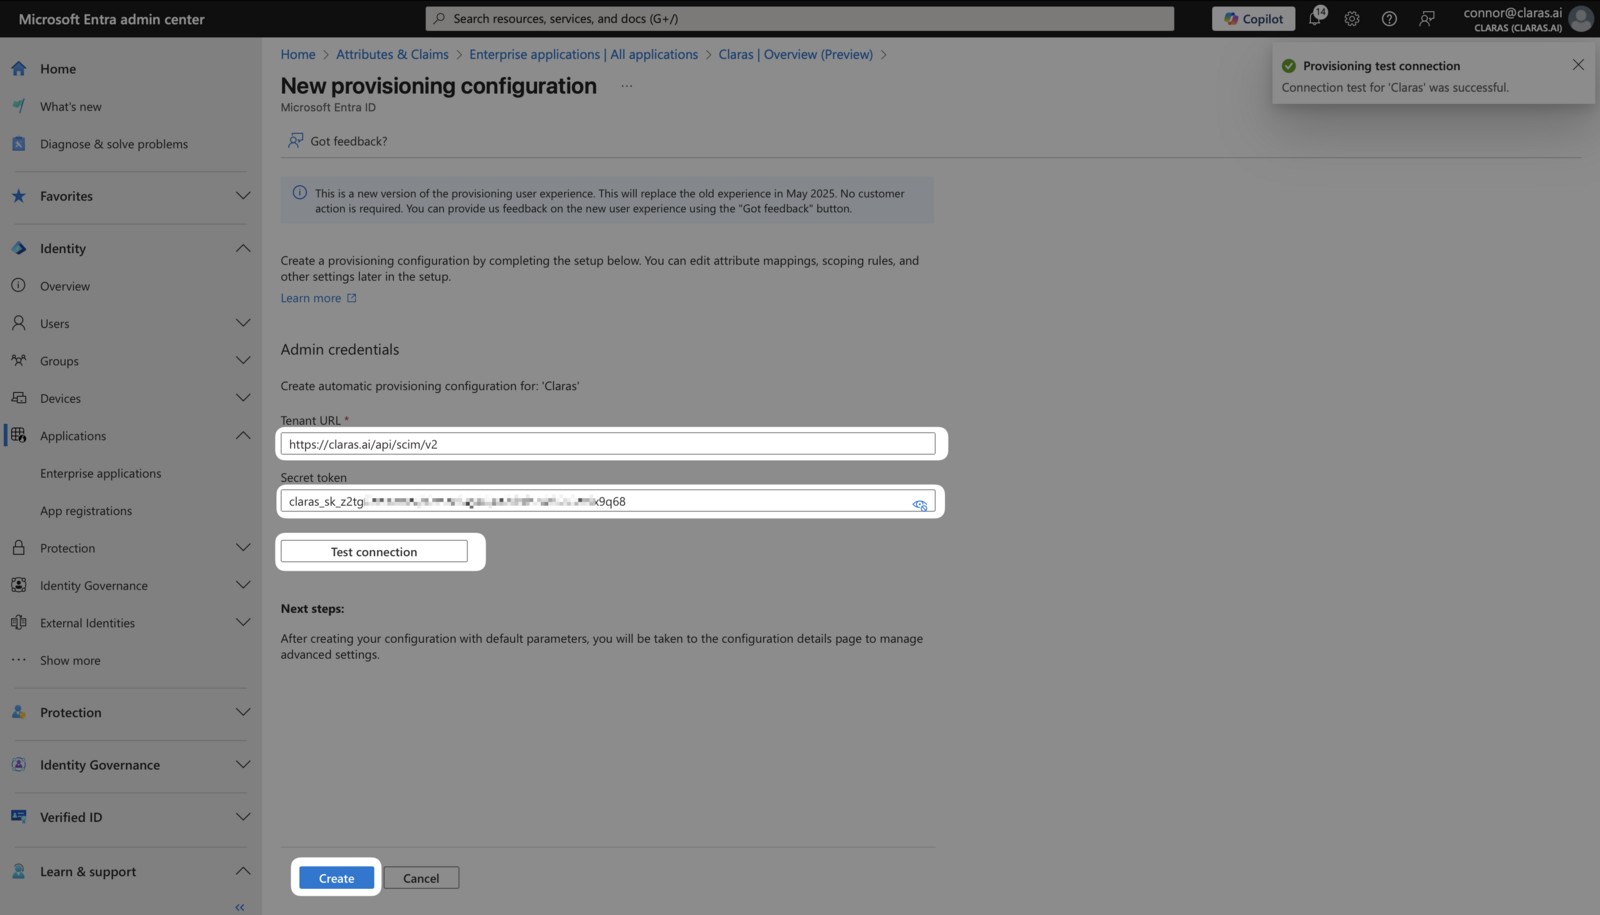
Test the connection to verify it succeeds, then click Create.
Unlike Single Sign-on configuration, SCIM doesn't require manual attribute mapping - the standard mappings work automatically.
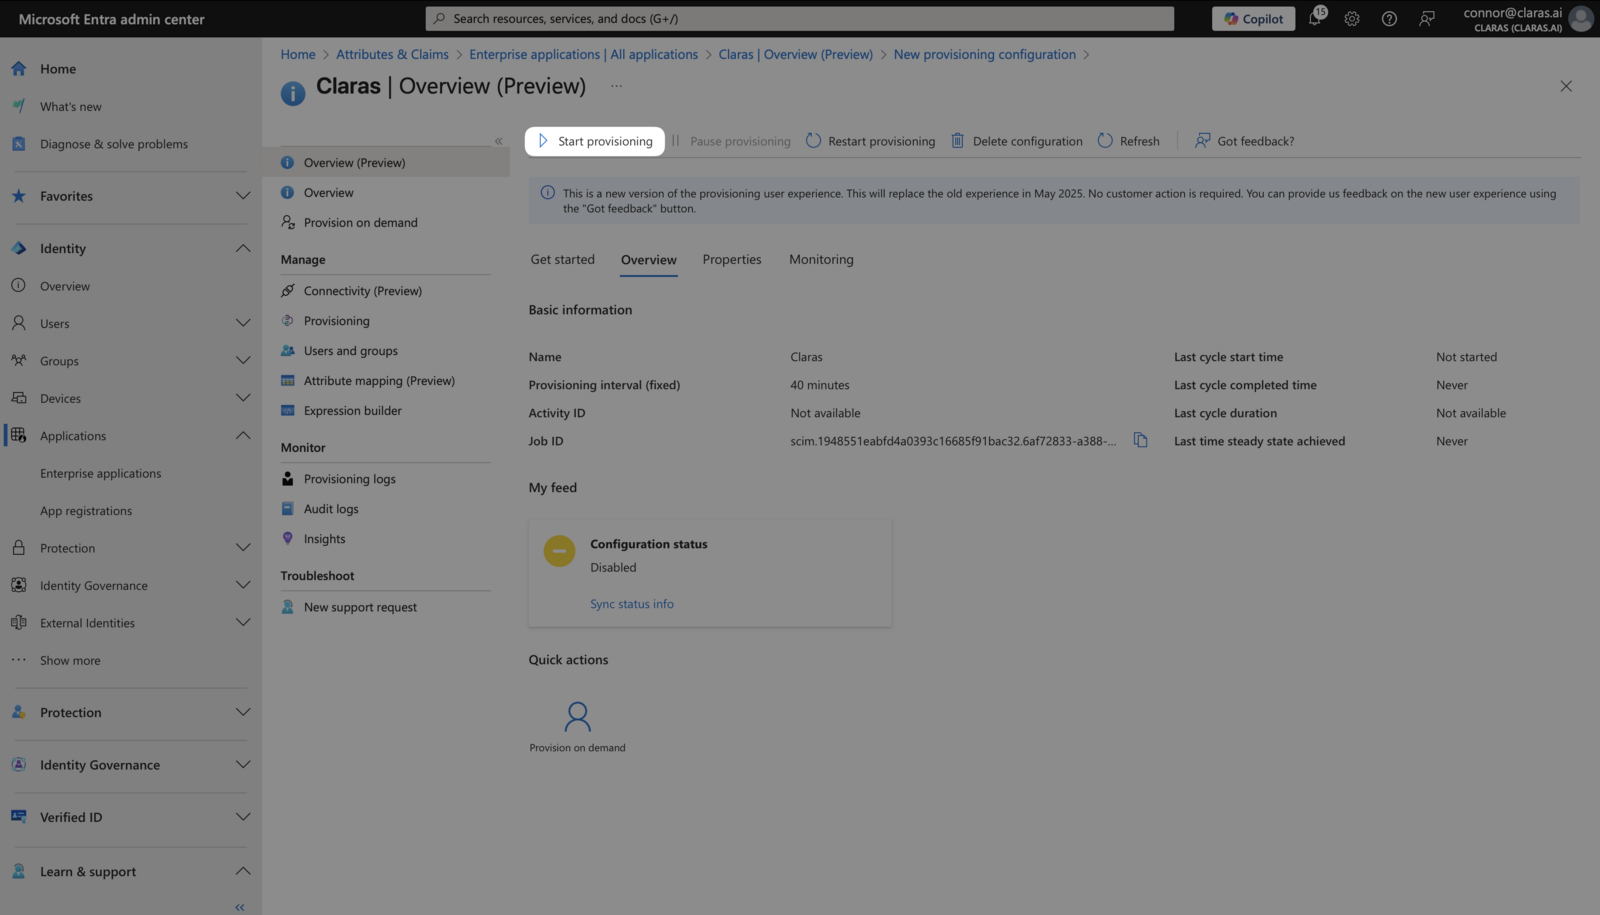
Start provisioning
Once configured, click Start Provisioning from the Overview page.
Assigned people and groups will appear in your Claras Team page within minutes. When someone is removed from the application, leaves an assigned group, or becomes inactive in Entra, Claras automatically archives their profile during the next provisioning cycle.
Next steps
With SCIM configured, your team management is now automated. Review Frequently Asked SSO Questions for additional guidance on managing your integrated workspace.
Last updated 28th January 2026 by Connor